Create Free SSL Certificate Using sslforfree in 2020
In this tutorial you will learn how to Create Free SSL Certificate Using sslforfree website online in 2020. sslforfree.com provides free ssl certificates for 90 days. You will have to re-generate the certificate every 90 days. As per my opinion this is the easiest way to create certificates for your website. So without much time waste let’s get started. The process is similar with zerossl.com as-well. I will also show you how to resolve CAA record errors using Hostinger’s HPanel in this tutorial.
Step 1:
Go to ssl for free website
Step 2:
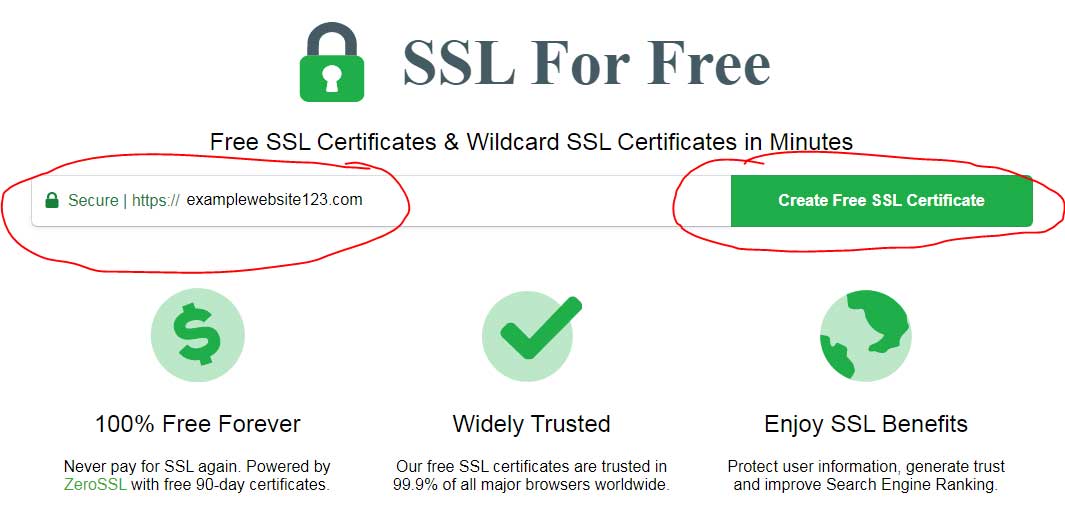
Type your domain name and click on create free ssl certificate button as shown below:
Step 3:
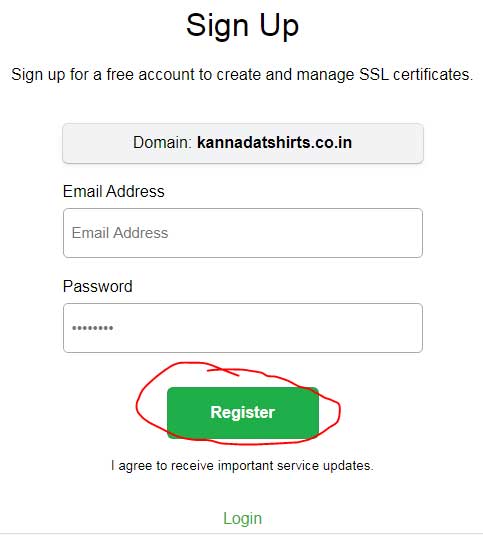
Enter you email address, password and click on the register button as shown below:
Step 4:
Ensure your domain name appears in the enter domains box and click on the next step button as shown below:
*Please note that you don’t enable ‘I need a wildcard certificate’ because it is a premium feature.
Step 5:
Select 90 Day certificate and click on the next step button as shown in the image below:
*Please note that 1-Year Certificate is a premium feature. There are monthly and yearly plans for ssl certificates for single and multiple domains. SSL For Free also offers wildcard certificates at the most reasonable price.
Step 6:
Enable Auto-Generate CSR and click on the next step button as shown in the image below:
Step 7:
Choose free plan and click on the next step button as shown in the image below:
*Please note that the free plan is automatically selected by default.
Step 8:
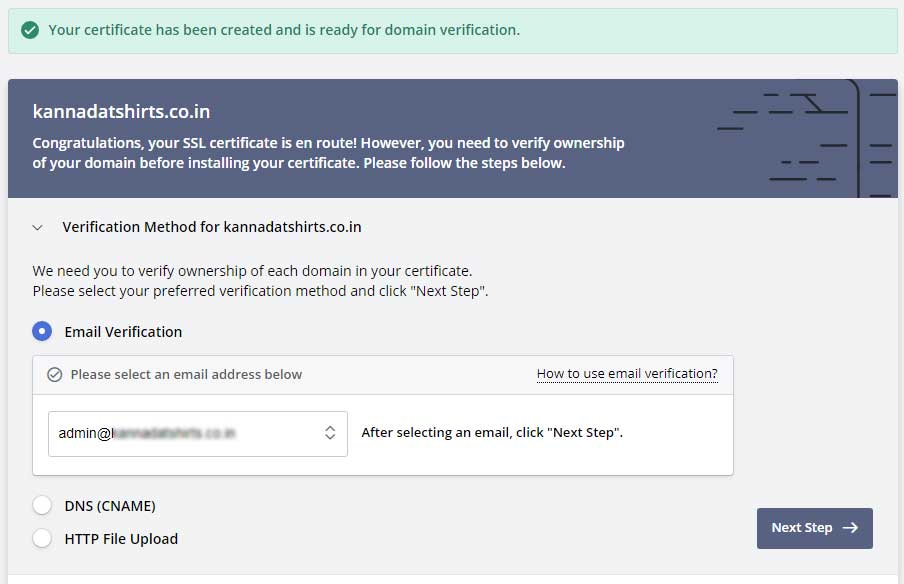
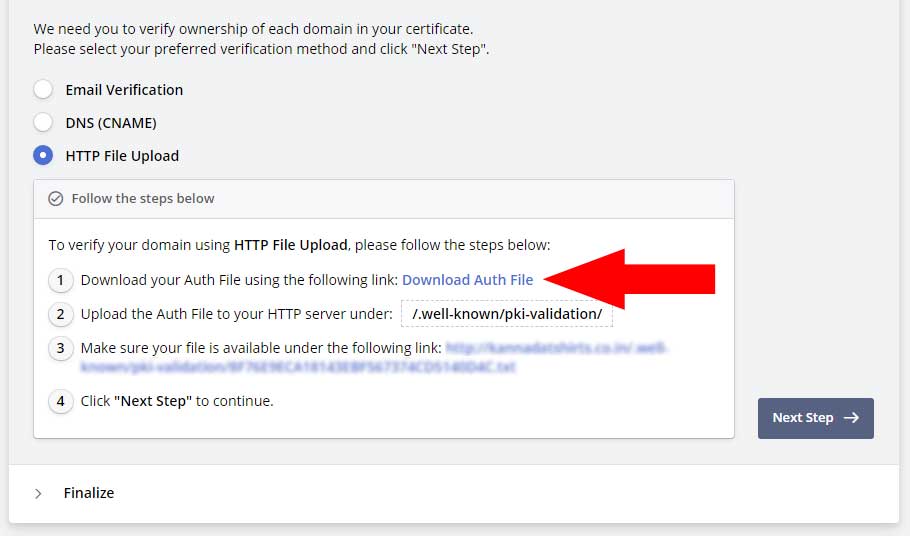
The next step is domain ownership verification. There are 3 modes to verify your website’s ownership. In this tutorial I will be showing the HTTP File Upload method.
Step 9:
Select HTTP File Upload, click on Download Auth File and save the text file on your computer.
Step 10:
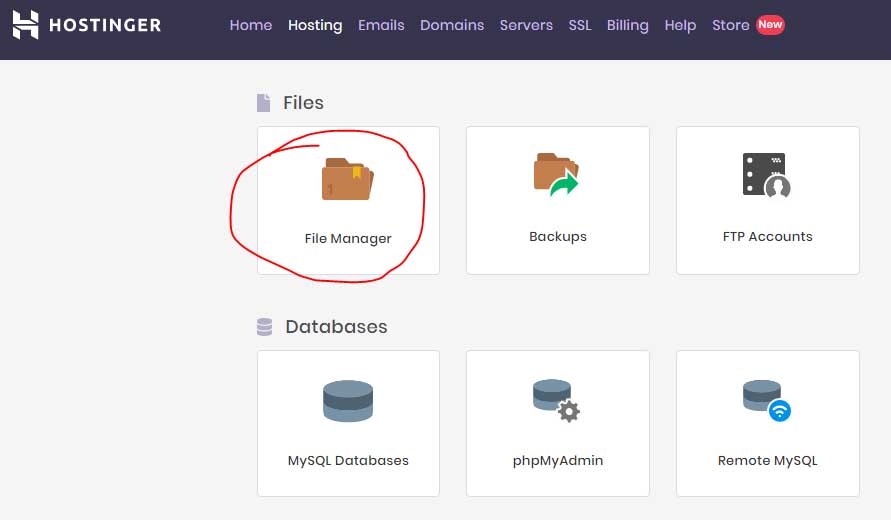
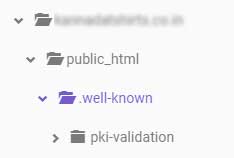
Login to your hosting’s cpanel, select the domain for which you want to create ssl certificates and create 2 folders by name .well-known and pki-validation using file manager. Note that pki-validation folder should be created inside .well-known folder. I am using hostinger’s cpanel for this tutorial.
The folder structure is as below:
Step 11:
Now upload the downloaded text file (Refer Step 9) inside the pki-validation folder.
Step 12:
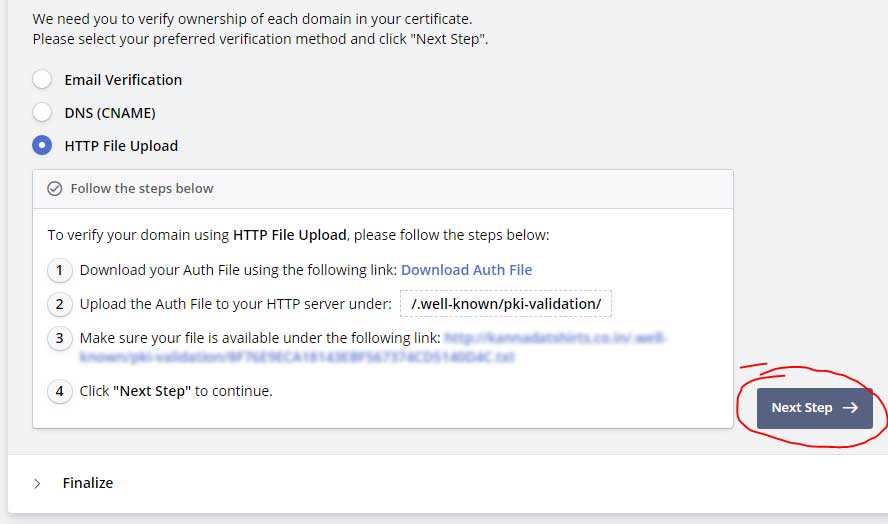
Now click on verify domain button to start the verification.
If you get an invalid CAA record error like the below then you will have to add CAA records to your DNS. Please refer this article: Troubleshoot CAA Records
Step 12 should have concluded your free ssl certificate process but if it doesn’t you should have to follow the below optional steps:
Step 13 (Optional):
If you are getting CAA record error then you should have to add CAA records in your websites’s DNS. Now let’s see how to do that:
First login to your website’s CPanel and the launch the DNS Zone Editor. The below is the DNS editor of Hostinger’s HPanel. Your CPanel options may vary.
Step 14 (Optional):
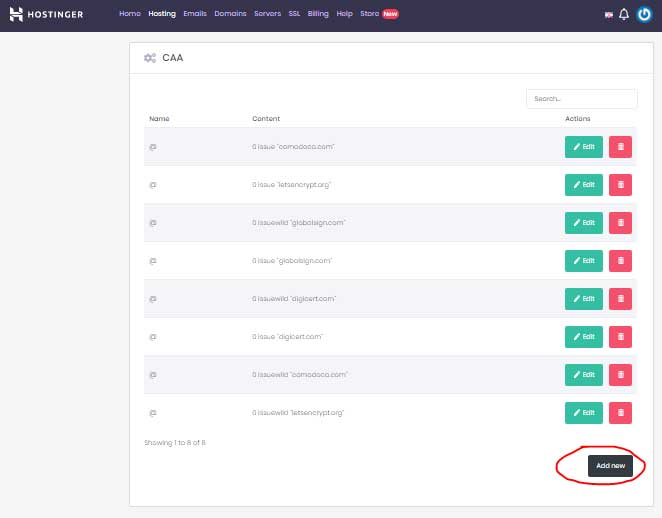
Click on add new button in your CAA records section as shown below:
You should add CAA records depending on your requirements. I recommend you to add 2 CAA records as shown below:
Please refer this article on troubleshooting CAA records for more details.
For the name section type: @
And for the content section type:
0 issue "sectigo.com"
Then click on the create button.
Now click on add new button and add the second CAA record in the same way.
0 issuewild "sectigo.com"
Hostinger’s CAA records looks like the below:
Step 15 (Optional):
Once you have added CAA records you may proceed to the verification process again. So go ahead and click on Verify button. Once the verification is successful you should see the success message as below:
Step 16:
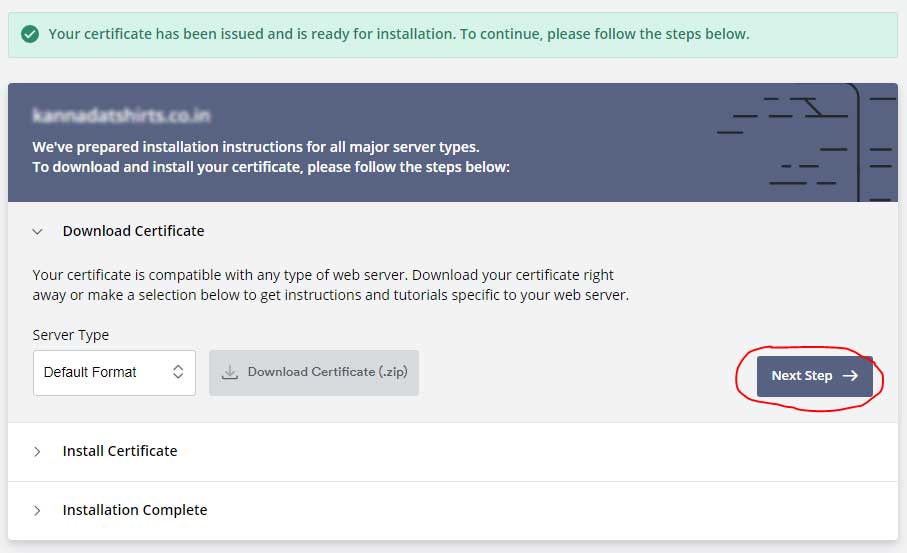
Now the next step is downloading the SSL Certificate to your computer. So click on the next step button with the default format selected.
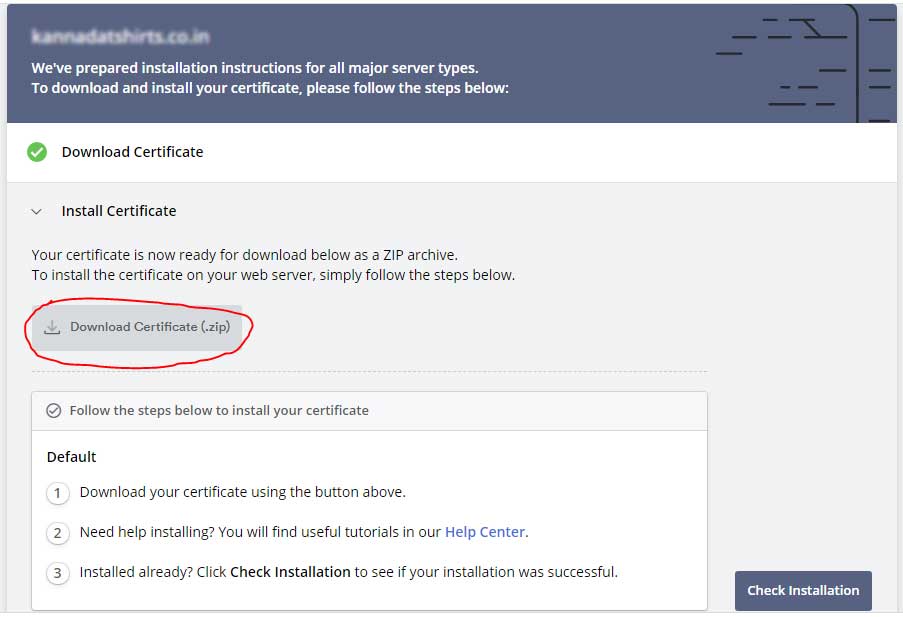
Now click on Download Certificate and download the ZIP file on your computer.
Step 17:
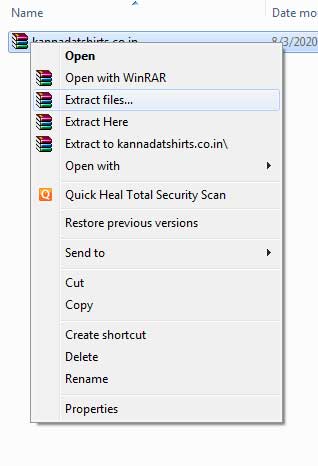
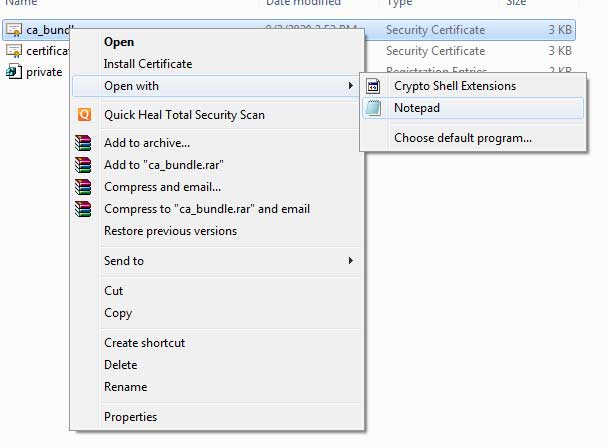
Extract the ZIP file. The Zip file contains 3 files:
- ca_bundle
- certificate
- private key
Step 18:
Go to your websites CPanel and Launch the SSL manager.
Final Step 19:
Open all the 3 files (ca bundle, certificate and private key) one by one with text editor such as notepad, copy the text inside it, go to SSL generator in your websites’s CPanel and paste each copied content into relevant boxes and click on the install button.
Your CPanel options may look same or similar as below:
After SSL certificate installation you should be able to see the list of installed certificates as below:
This concludes this tutorial on Free SSL certification generation and installation.
See you with another interesting tutorial soon. Jai Hind!
- MS Word Shortcut Keys PDF - October 13, 2024
- What is MS Word and its Features PDF - October 10, 2024
- 10 Free Word Templates for Every Need - October 10, 2024











Great blog !!!
Very informative and important blog.