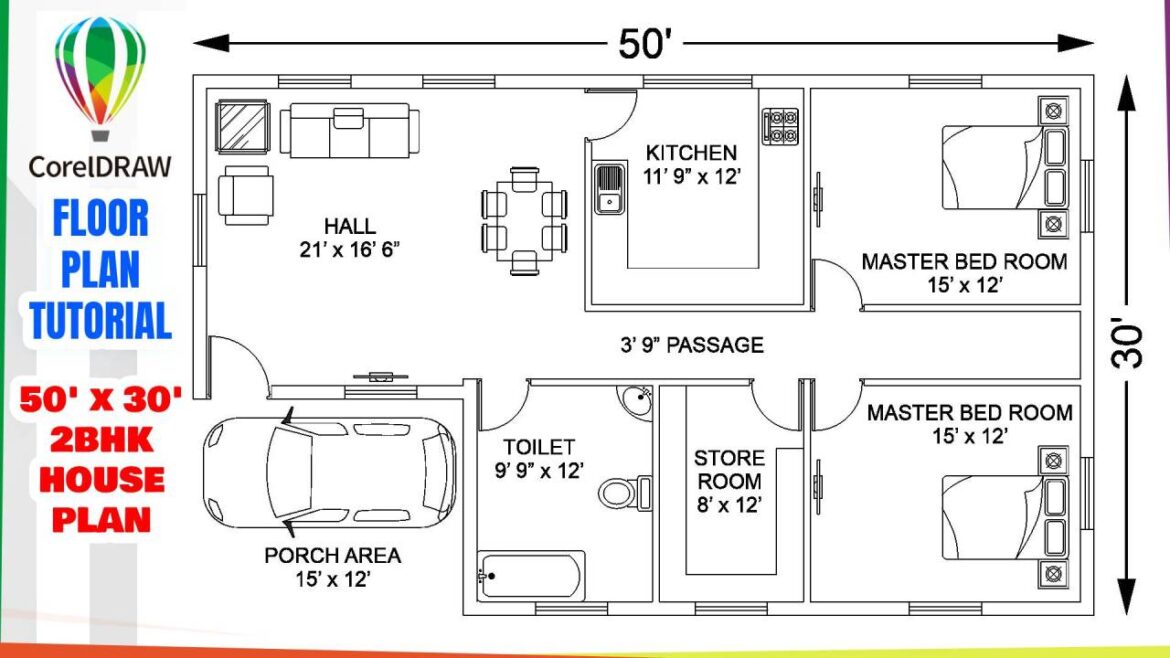
How to Draw a 50 x 30 Floor Plan in CorelDRAW
In this tutorial you will learn How to Draw a 50 x 30 Floor Plan in CorelDRAW. CorelDRAW is an awesome tool with which you can create more precise vector artworks. You can draw simple to the most complicated drawings with this software. So if you have a question that could you draw cad drawings and floor plans in CorelDRAW, then my answer is yes with some limitations. You may not be able to draw large floor plans in CorelDRAW Graphics Suite as the maximum page size supported is 1800 by 1800 inches (150 feet by 150 feet). So technically speaking you can draw floor plans up to 150 feet in dimension. This workspace size would more than sufficient to draw small and medium house plans. For bigger plans and architectural drawings you may consider using CorelDRAW Technical Suite or CorelCAD.
Now lets see how to draw a house plan in CorelDRAW Graphics Suite with exact measurements. You may also watch the detailed step by step video tutorial below:
Drawing Floor Plan in CorelDRAW – Page Size & Units of Measure Settings
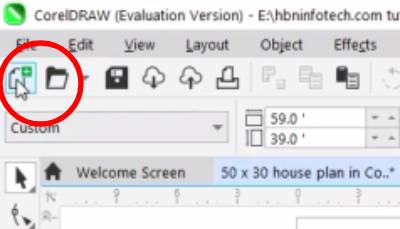
First click on New Document as shown in the image below
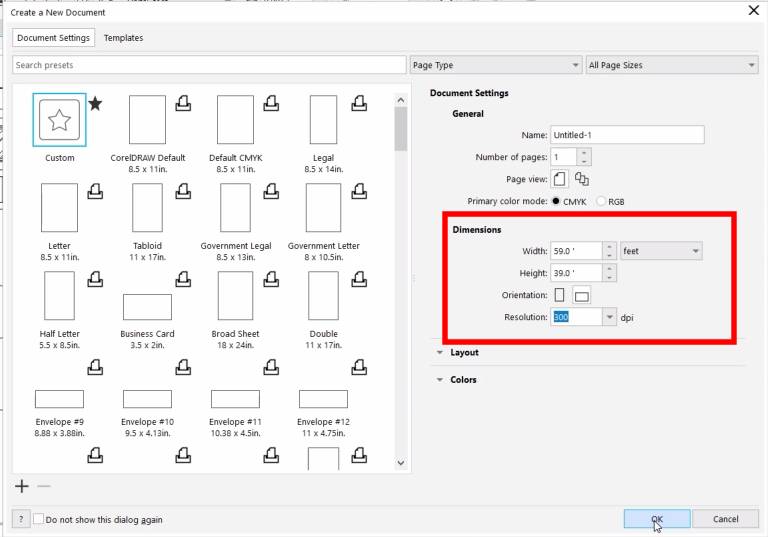
Next in the dialog box that pops up select feet for the units of measure. Since we need some extra space, set the width and height of the document as 59′ x 39′ respectively and click on the OK button.
Creating the outer walls
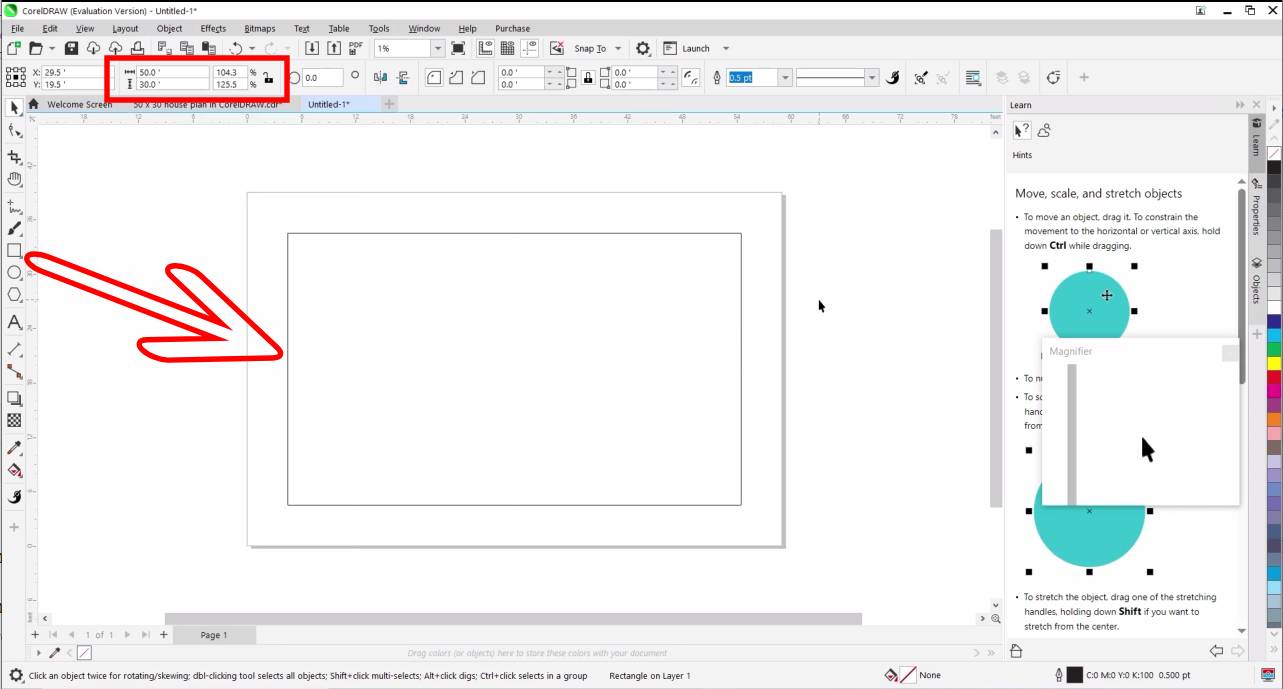
Next you will need to create a bounding box for the entire floor plan’s measurement, to do that draw a rectangle, click on the lock symbol to unlock aspect ratio. Then enter the width and height of the rectangle as 50′ x 30′ respectively and press the enter key.
To centre the rectangle to the page, go to align and distribute in the object menu, and click on centre to page. Alternatively you can also press the letter P on your keyboard.
Next step is to create the walls, In this tutorial I shall be using the measurement of 9″ for the exterior wall and 4.5″ for the interior wall. Since the measurement of wall thickness is in inches you will need to change the units to inches. To do that deselect objects by clicking in the empty space and set the units to inches as shown.

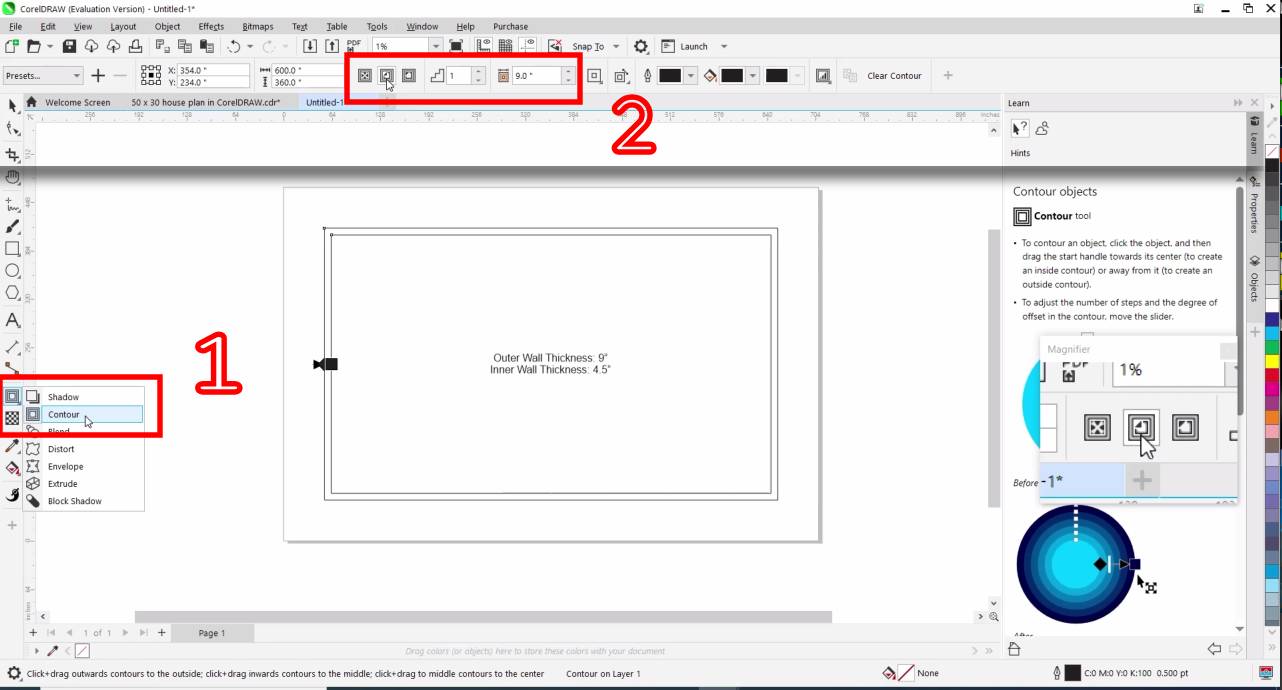
Next select the rectangle you just created and click on the contour tool. enter 9″ for counter offset and click on inside contour. Next go to object menu and click on break contour apart to break the contoured components separately. With this step a 9″ exterior wall is created.
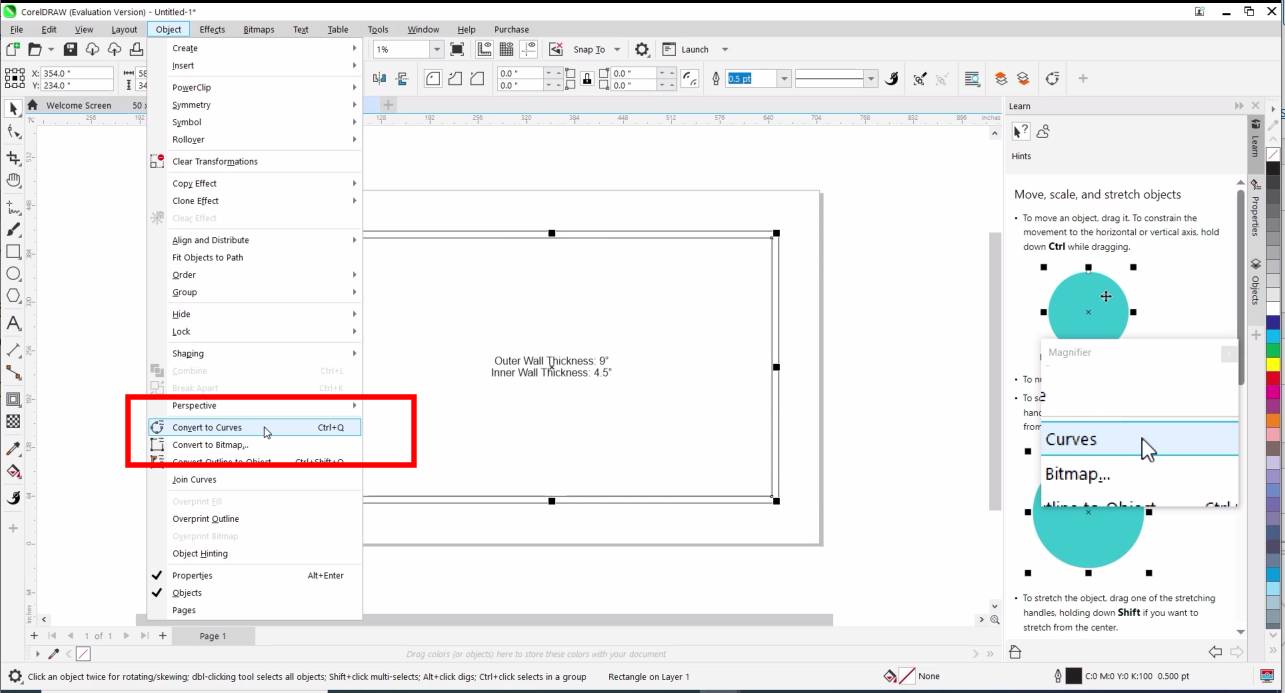
Next step is to to create the inner walls. For that you will need to break the inner rectangle into individual lines and copy them at a specific distance. To do that first select the inner rectangle, go to the object menu and click on convert to curves.
Then take the shape tool, select each node one by one and click on break curve as shown.
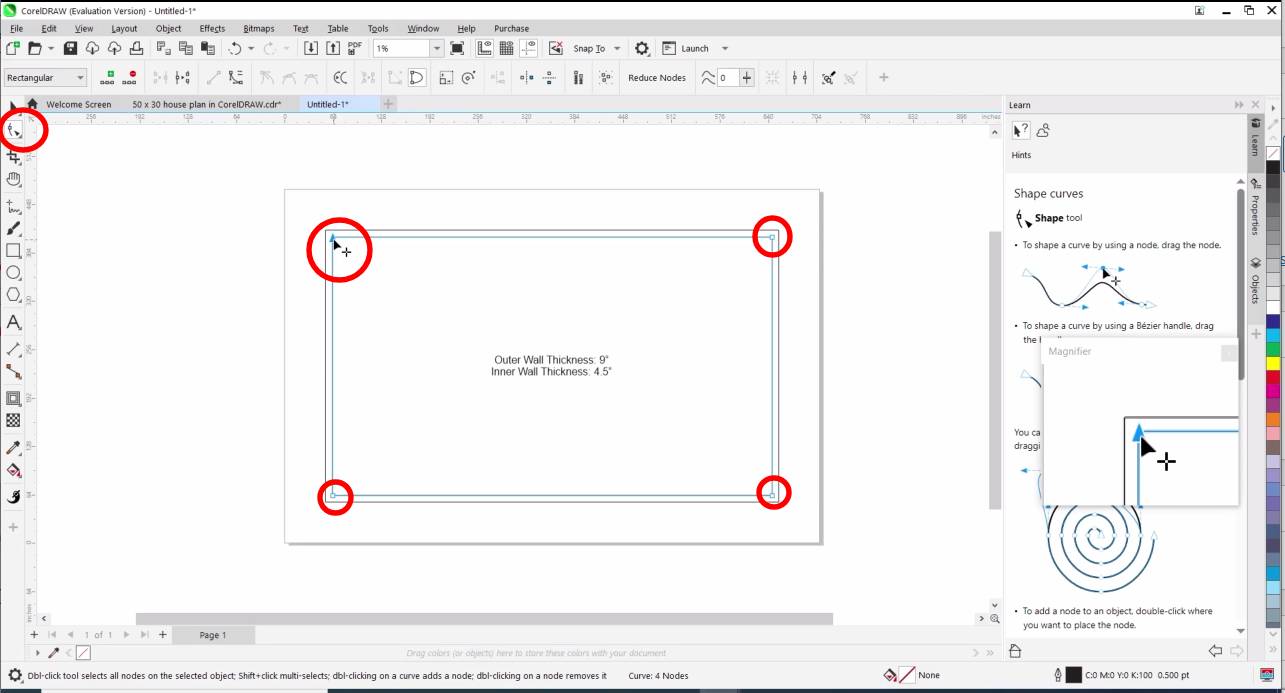
Then go to object menu and click on break curve apart. With this step all lines of the rectangle are separated which enables you to move or copy them independently.
Creating the inner walls
Now the next step is to create the inner walls. For this operation we are going to use the transform tools. Using transform tools you can make multiple copies of the objects at a specific distance. In our case we are going to make copies of the lines of the inner rectangle we just separated in the previous steps using break curve apart command.
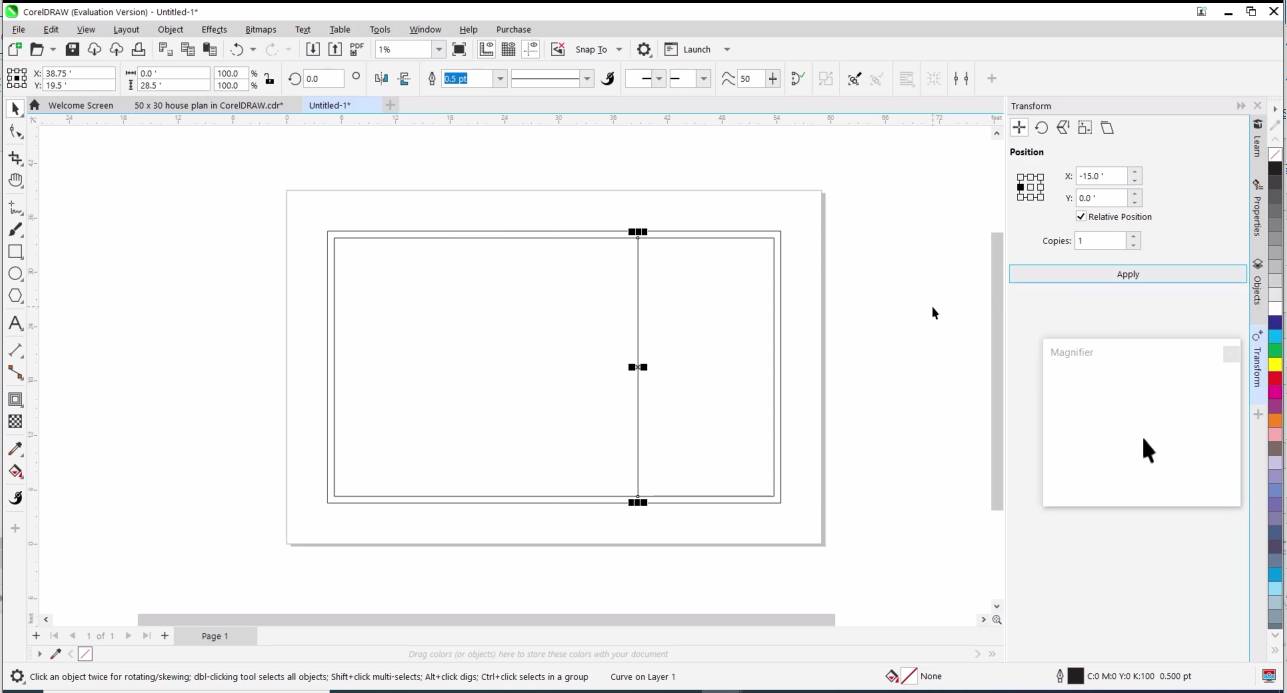
Now lets create bedrooms measuring 15′ by 12′ on the right side of the floor plan. To do that first click and select the line on the right side of the inner rectangle. Then Go to dockers in the window menu and click on transform. Then click on position. Among the 9 little squares under position select the left middle square. For the X type -15.0′, for the Y type 0.0′, for the number of copies type 1, check relative position and click on the apply button.
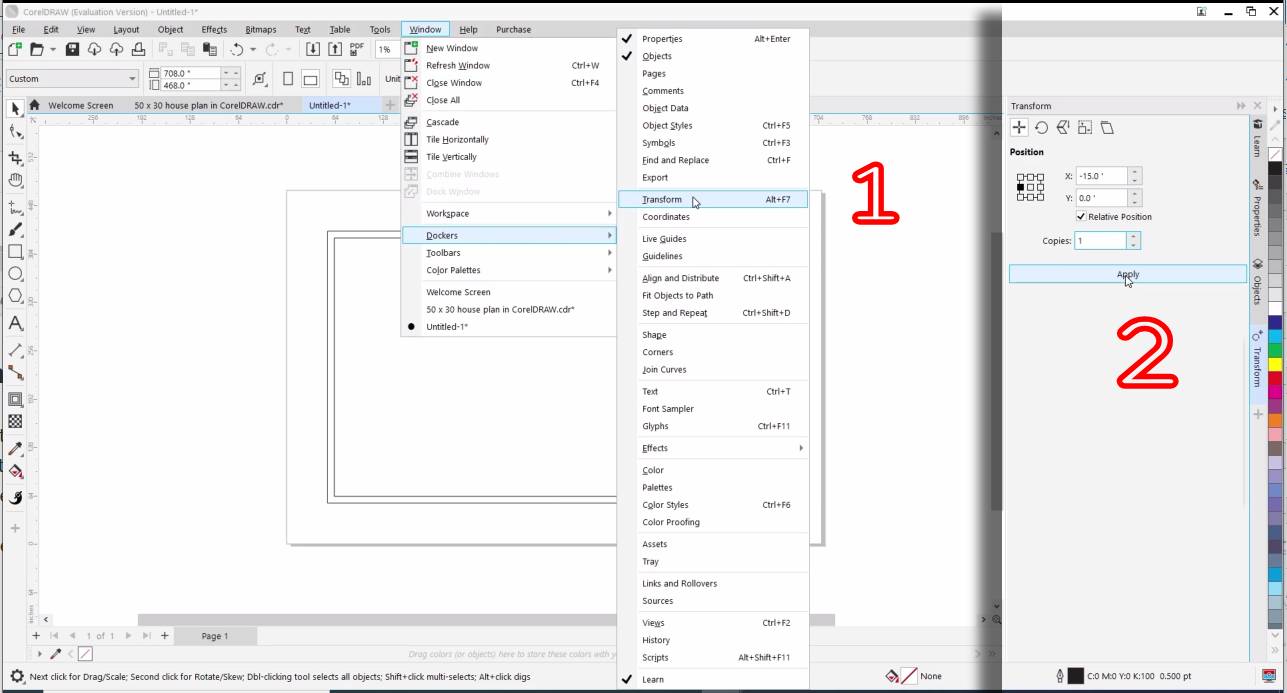
Now you should see that the selected line is copied in the negative X direction as shown in the image below.
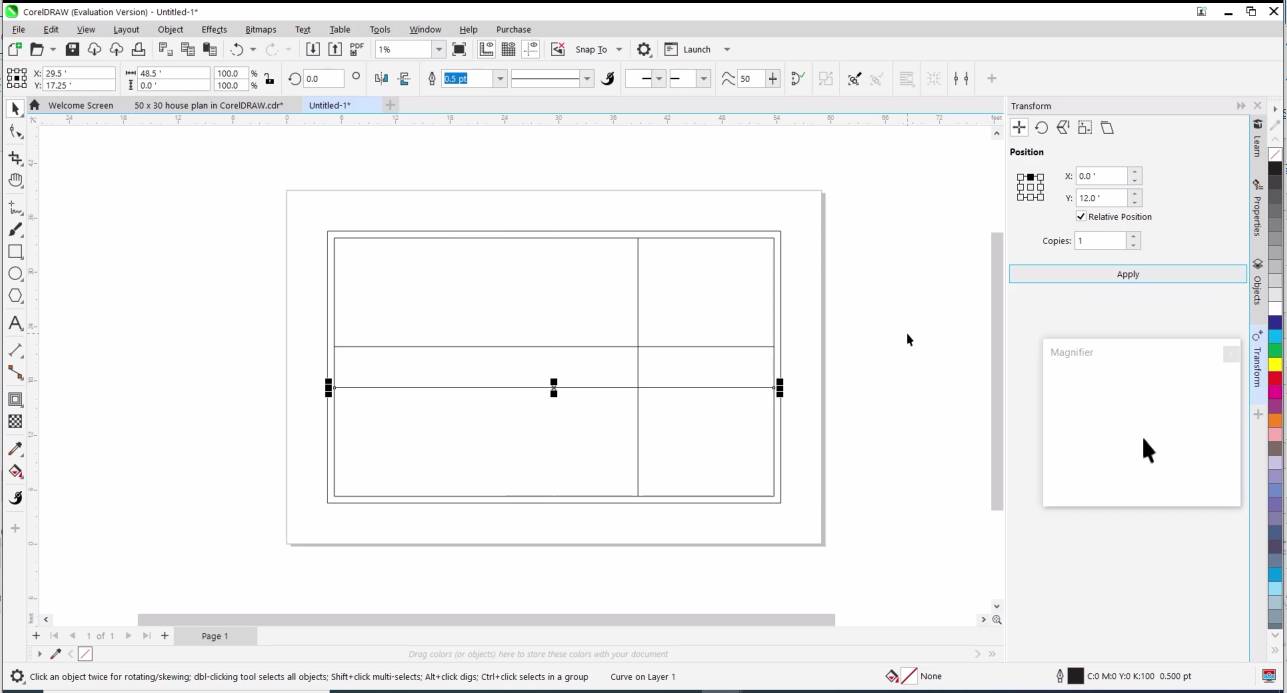
In a similar way copy the top and bottom lines of the inner rectangle in the vertical direction for -12.0′ and 12.0′ as shown below.
Next offset the line for 4.5″ which is the wall thickness as shown below.
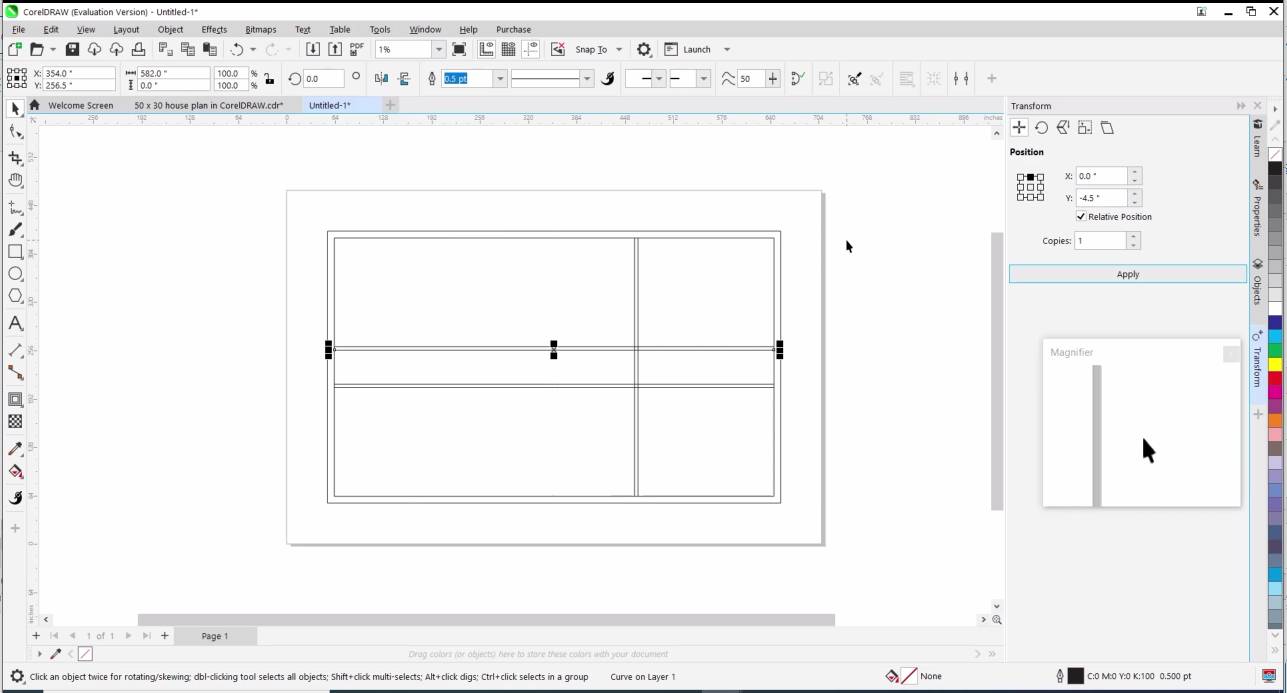
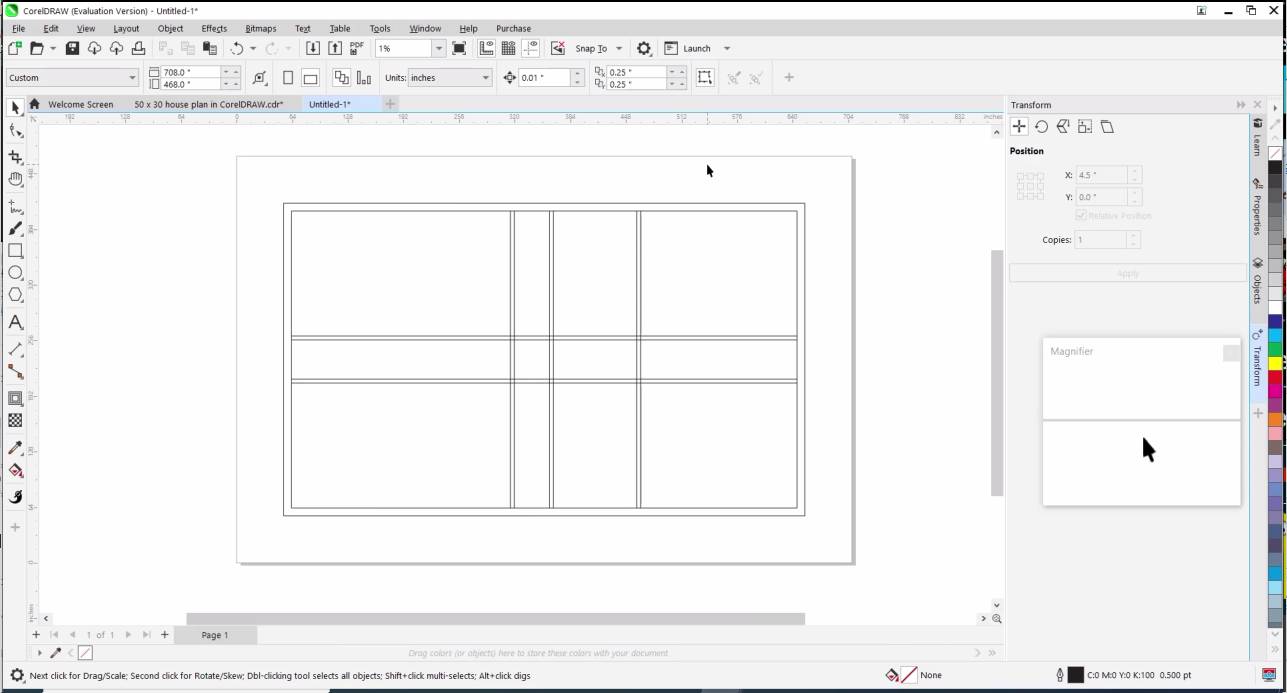
Similarly offset the lines as per the requirement as shown below.
Trimming & Creating Wall Openings
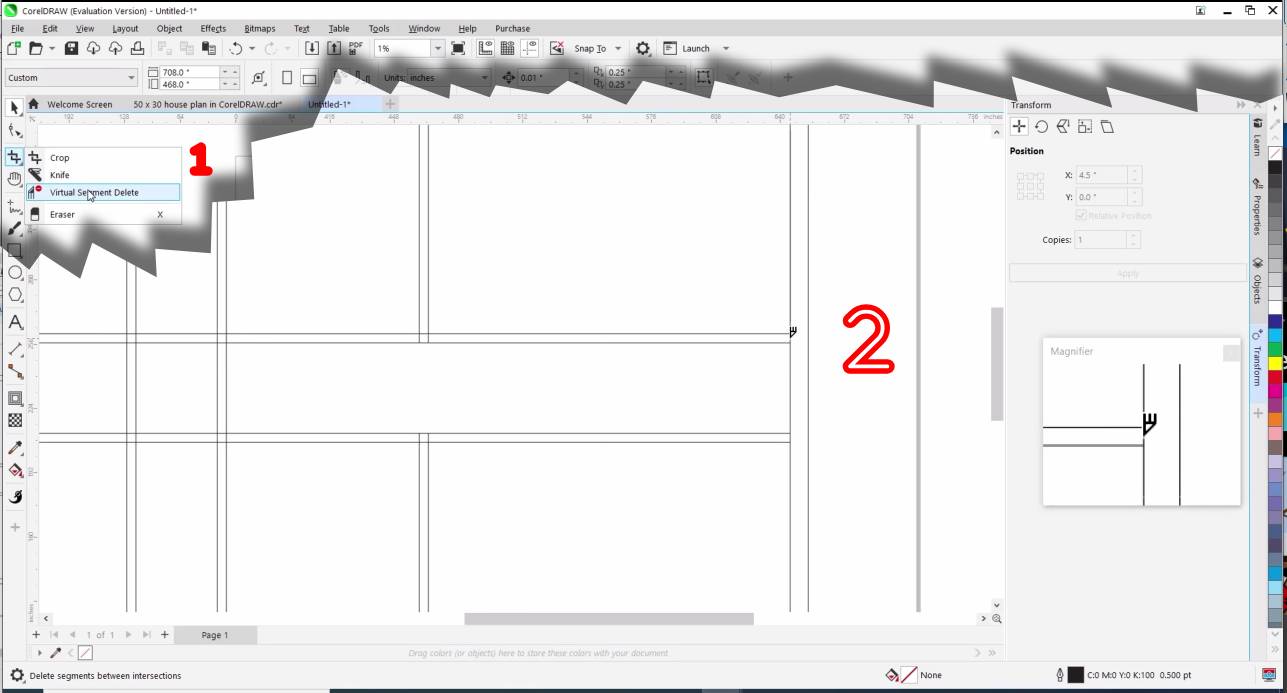
To trim the unwanted portion of lines and to create wall openings you can use the virtual segment delete tool and click on the portion that you want to trim. Please note that Virtual segment delete doesn’t separate the line segments so you will need to use the break curve apart option.
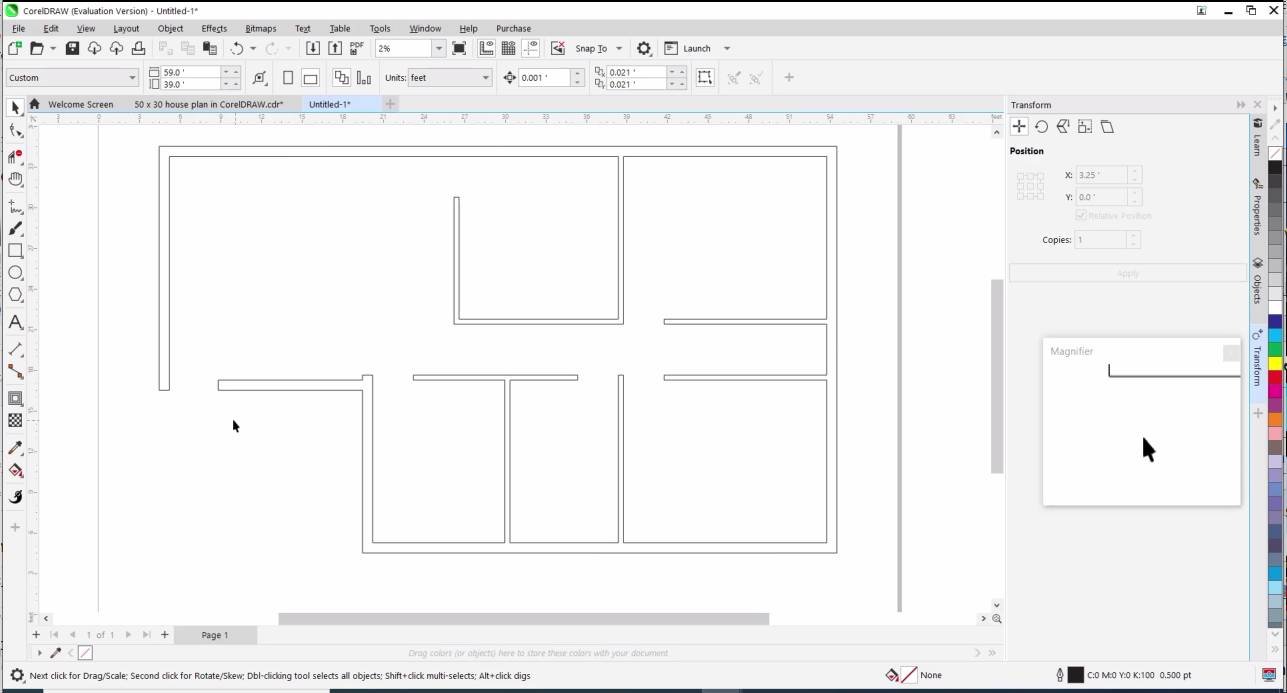
Continue the above explained procedures and create all the rooms and walls as shown below. To create the door ways you can simply extend and copy the lines and trim them. The main door in this floor plan is for 3′ 6″ wide and all other doors are 3′ wide. To accomplish all these things you will have to offset lines using the transform option. You will need to trim the lines with virtual segment delete tool and sometimes you might have to use the break apart command as required. Please watch my video tutorial for easy and better understanding.
Creating Doors & Windows in CorelDRAW
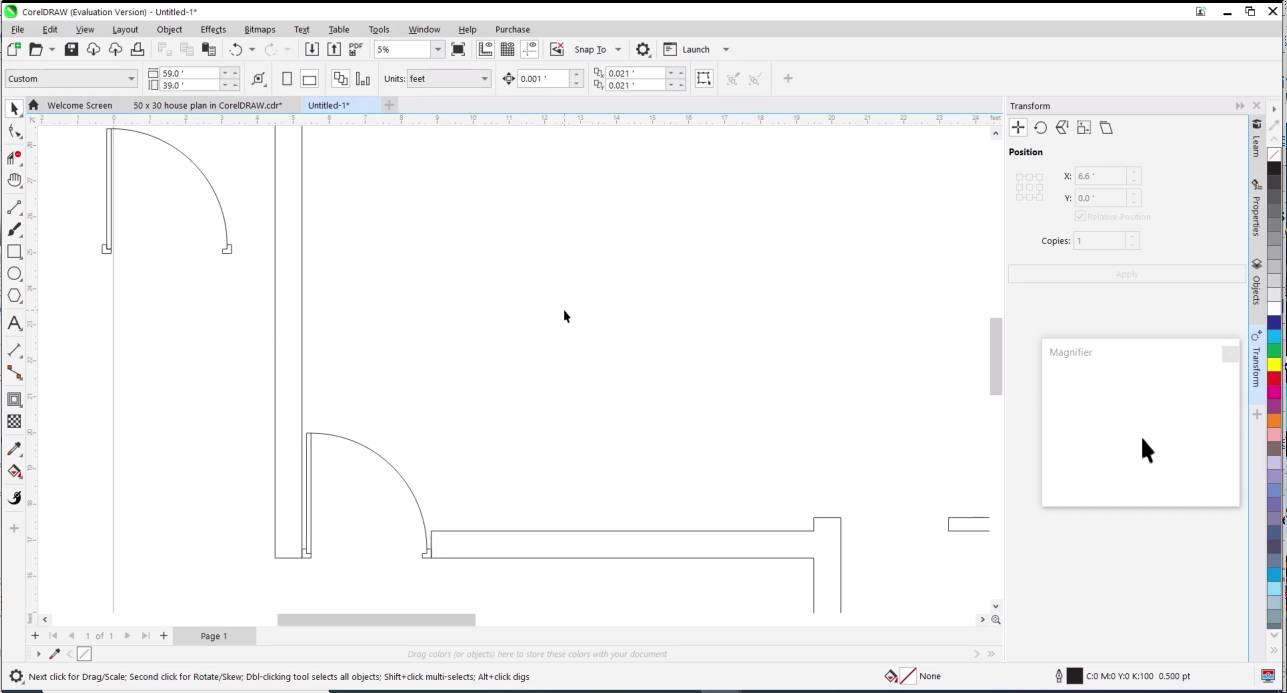
You can create doors and windows with lines and arcs. The door frames in this floor plan is 3″ and the door thickness is 1.5″. Once you are done with the doors, group all the door components together. Later make copies of the door, flip rotate and place it where necessary.
You can create the windows using the rectangle tool. All windows in this floor plan are 4′ wide except the kitchen which is 6′ wide.

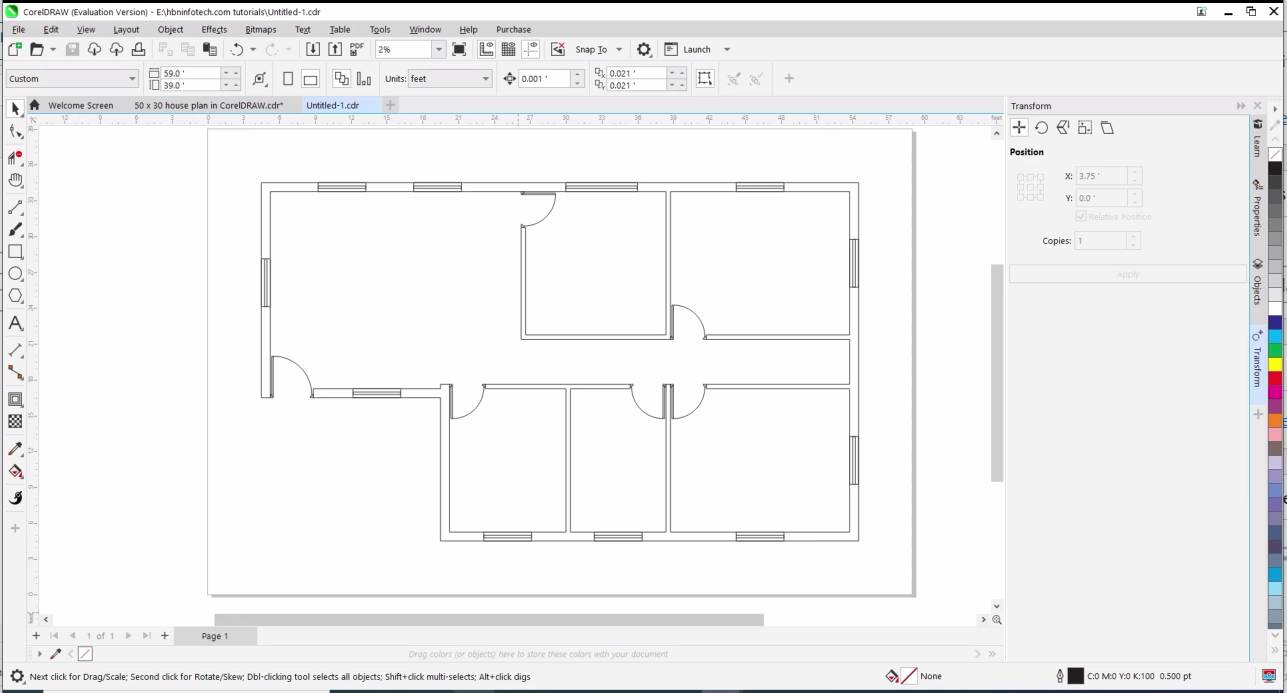
The below image shows the placement of doors and windows. CorelDRAW’s snap and align features help you to place the objects more precisely at accurate spots.
Importing Furniture Symbols
Next download and import the floor plan symbols pdf from my website. group, resize and place them as necessary. The below image shows the placement of furniture symbols.
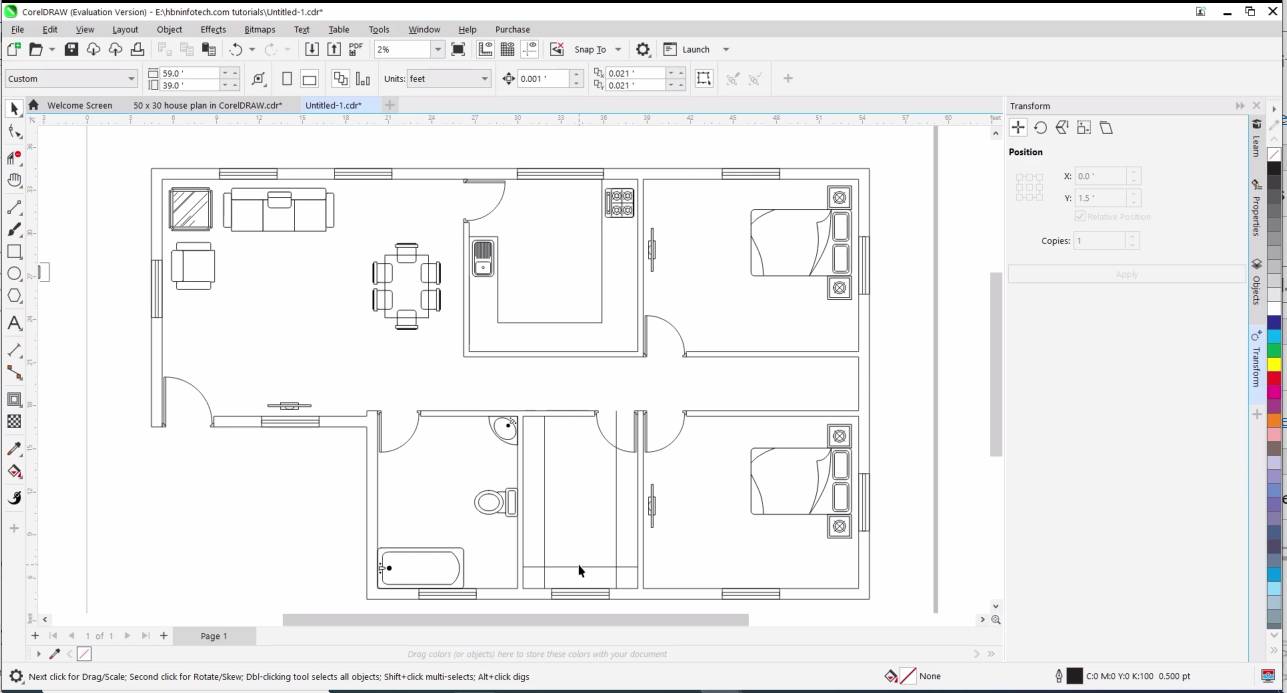
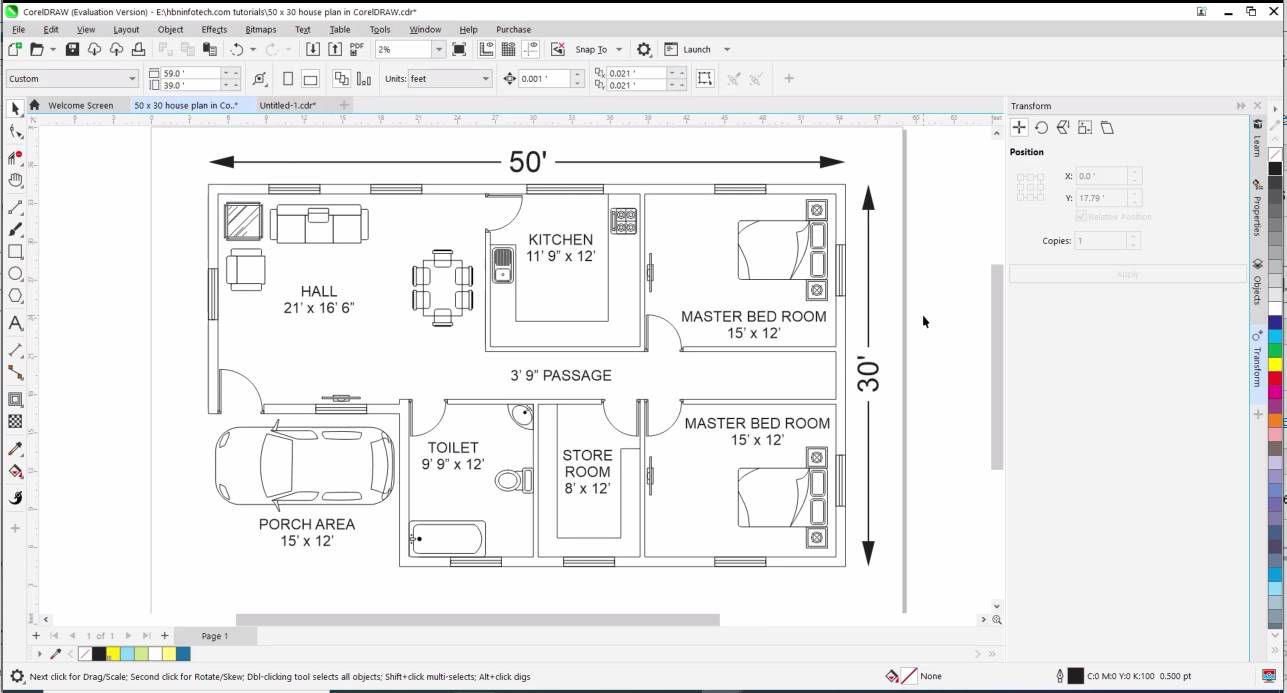
Once after placing the floor plan symbols you can create annotation using the text tool. The font size used in this floor plan is 1000 points. After that download the car symbol from my website and copy it into the floor plan. Finally create dimensions overall floor plan using the dimension tool. The font size that I have used is 2000 points. Since the dimension arrows aren’t completely customizable, I have used the polygon tool to create triangles. I have also changed the line thickness to 100 points. The finalised floor plan should like the below if you have followed my instructions properly.
My Final Insights
If anybody asks the question that whether they can you create a floor plan in CorelDRAW then my answer is YES and with 100% accuracy. If you like this article please share and if you have any questions please ask in the comments.
Similar Articles & Downloads
How to Draw a 50 x 30 Floor Plan in CorelDRAW
- MS Word Shortcut Keys PDF - October 13, 2024
- What is MS Word and its Features PDF - October 10, 2024
- 10 Free Word Templates for Every Need - October 10, 2024