How To Automate Your Work With Zapier And WPForms
Hello Everyone! Welcome to HBN Infotech Tutorials. If you want to learn how to integrate your web forms with an automation tool then you are at the right place. In this article you will learn How To Automate Your Work With Zapier And WPForms.
In a nutshell WPForms is a popular form builder with unlimited capabilities and Zapier is an automation tool that could be used to integrate apps and automate your everyday tasks that you do on your computer. Attractive deals and offers on WPForms, follow this link to grab the deals Now.
Zapier the superhero of the automation tools
I guess most of you haven’t heard about zapier yet, if so then here is what you should know about this jaw-dropping automation application. Did you that with zapier you could connect more than 2000+ web applications with one another and do automation of your everyday tasks? You can do tasks like:
- Sending automated emails.
- Automate the task of downloading the mail attachments.
- Upload or save files to your drive or cloud storage automatically.
- Store leads data of your web form to a spreadsheet or database automatically.
- Prepare a to do list of tasks such as sending remainder emails.
- Automate the task of sending personal emails to your clients.
- Automate content or post sharing across social media.
- Send automatic notifications about new leads to your team members.
- Do follow ups and even you can shorten your google drive links.
Actually this blog isn’t enough to describe as the possibilities are endless.
WPForms the King of WordPress Form Builders
I don’t need to introduce you to WPForms as most of you are already aware of this most popular WordPress plugin. I would address WPForms as the King of WordPress Form Builders because of its vastness, extraordinary features and endless possibilities. It has got a robust form builder, numerous form pre-made form templates, countless field options and more. More importantly it facilitates integration between most of the popular web apps including zapier.
Introducing WPForms Zapier addon
With WPForms Zapier addon it is possible for you to connect your web forms to numerous web applications such as Salesforce, FreshBooks, HubSpot, Twilio, Google Contact, Trello, Asana, QuickBooks and various other popular apps that you might have come across in your everyday situations.
Most of you cannot have one single application do all your things, and obviously you may avoid working with multiple applications or software. But the real challenge is synchronization that is, how do you work and manage multiple applications from within one single medium. That’s where zapier comes into picture, it allows you to sit at one place and handle all applications and automate them.
Now the next challenge for website owners is that it could be difficult for them to manage, handle and share web form data with other applications. Most of the time there is no one single solution. Thanks to WPForms as it allows the integration with popular applications such as zapier and many others.
How To Automate Your Work With Zapier And WPForms?
Installing WPForms Zapier addon on your WordPress site
Before I begin I would like to tell you that you will need both Zapier and WPforms subscription to use this feature. Later you will need to install and activate WPForms Pro WordPress plugin. Once activated, you should also install and activate WPForms Zapier addon as well.
Once activated, you should navigate to WPForms settings and go to integrations tab as indicated in the image below:
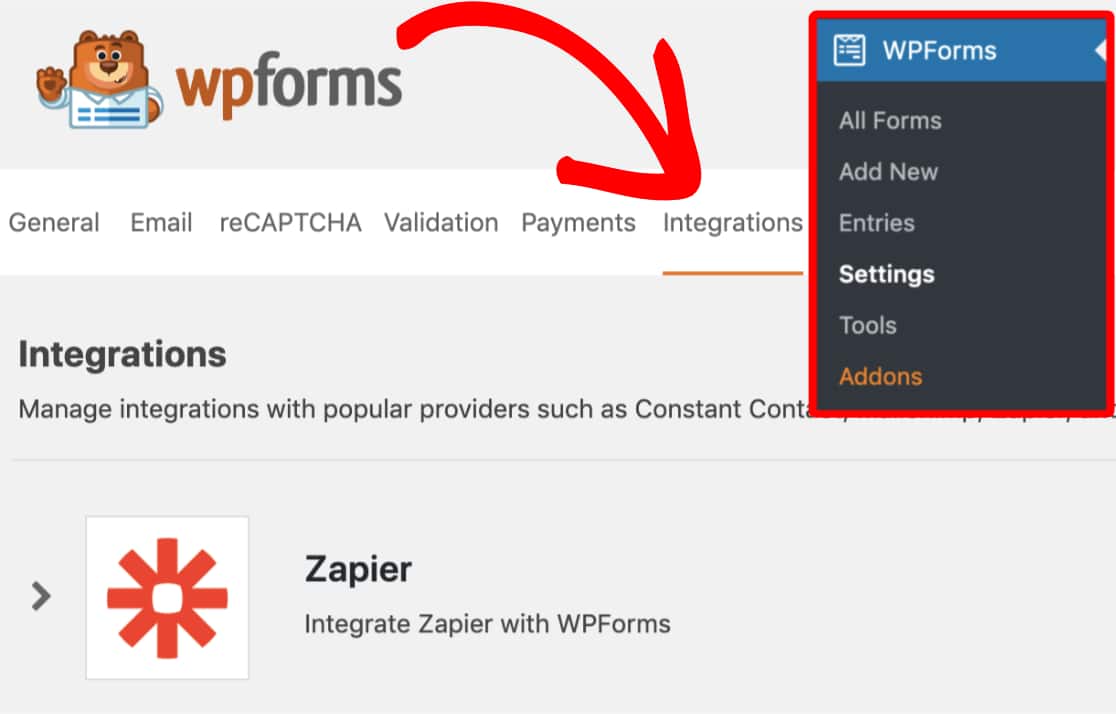
There you should be able to see an option for Zapier, just click on that. This action will prompt you to enter the Zapier API key details. You could find these credentials inside your Zapier account. You will need to login, find the details, come back to WordPress and paste it into WPForms zapier API settings.

How to do the Zapier’s “zaps”?
The term “Zap” in the context of Zapier denotes the integration and automation of apps. Now coming to WPForms Zaps automate the job of sending web form data to other applications such as Salesforce and QuickBooks.
To create a Zap you will need to login to your Zapier account, if you want to test drive you can create a free account. But not all the integrations are possible with free plan, so you might have subscribe to use the premium features.
So once you have logged in, you should click on the big black plus sign as indicated in the image below:
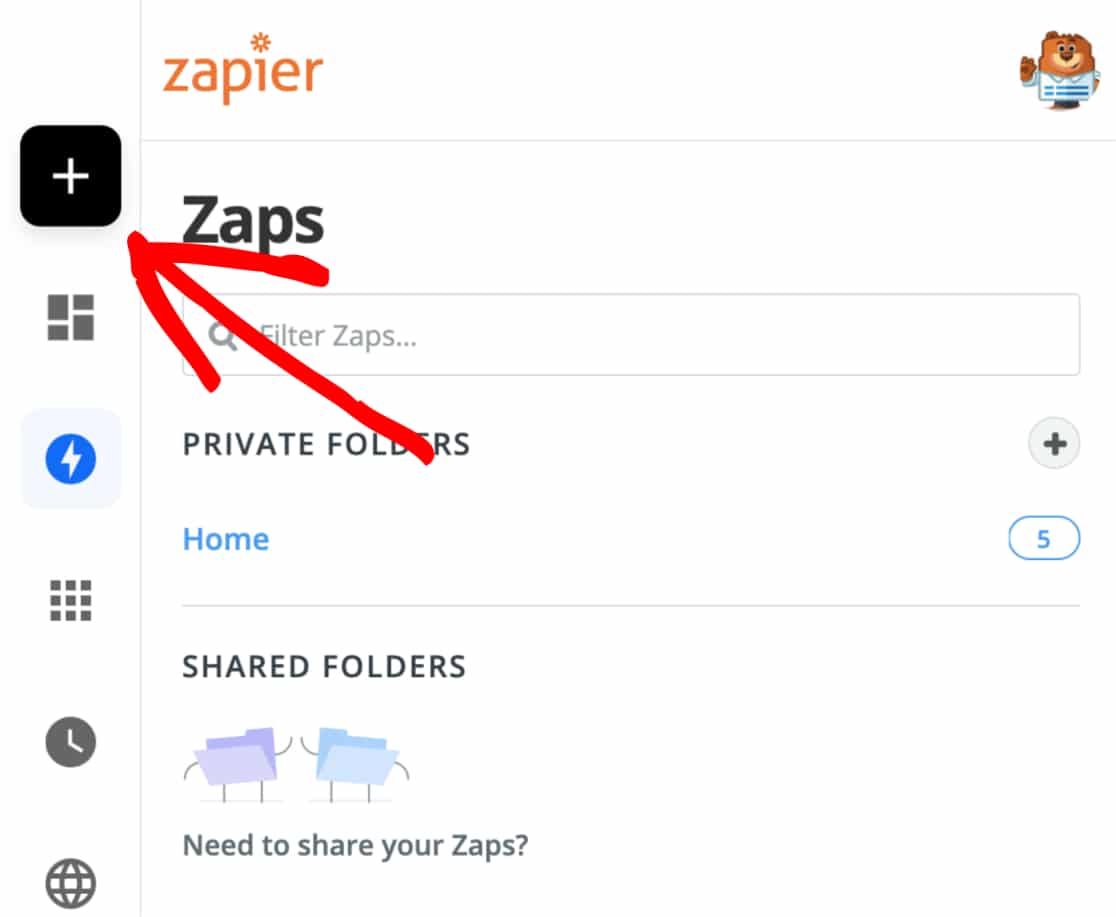
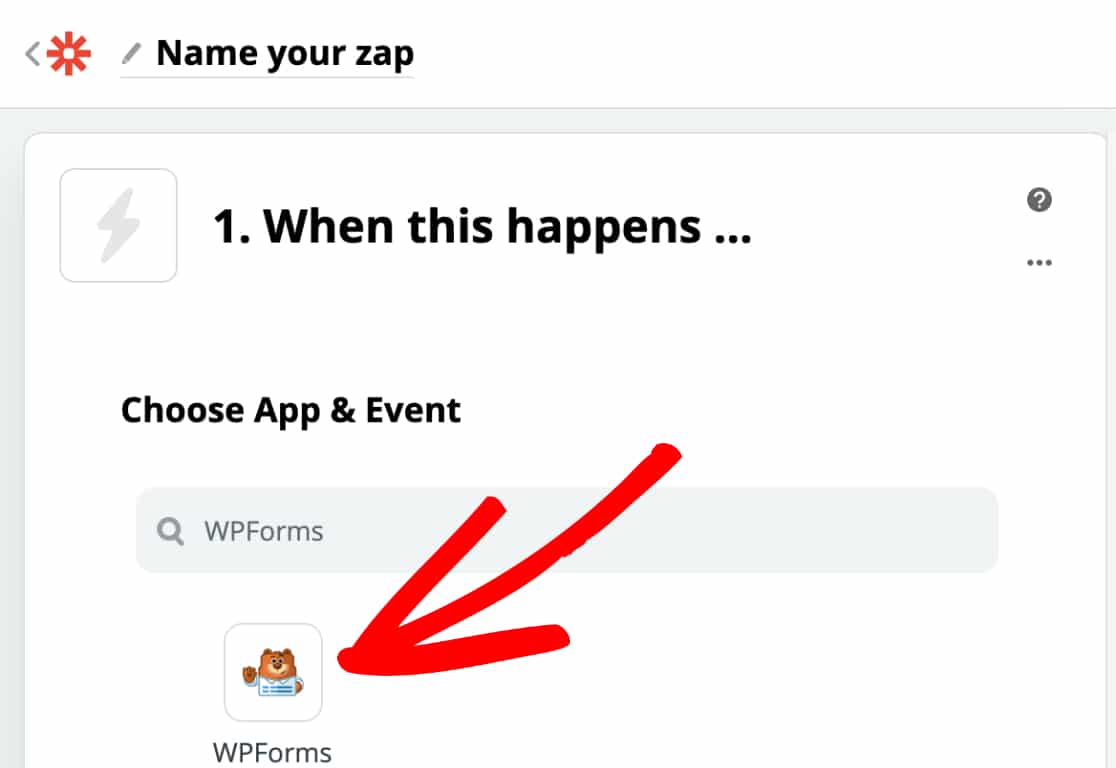
This launches the setup for a new zap, now at this point you can name the zap and select WPForms as the prime app. To do that type WPForms in the search box of Choose App & Event and click on WPForms as shown in the image below:
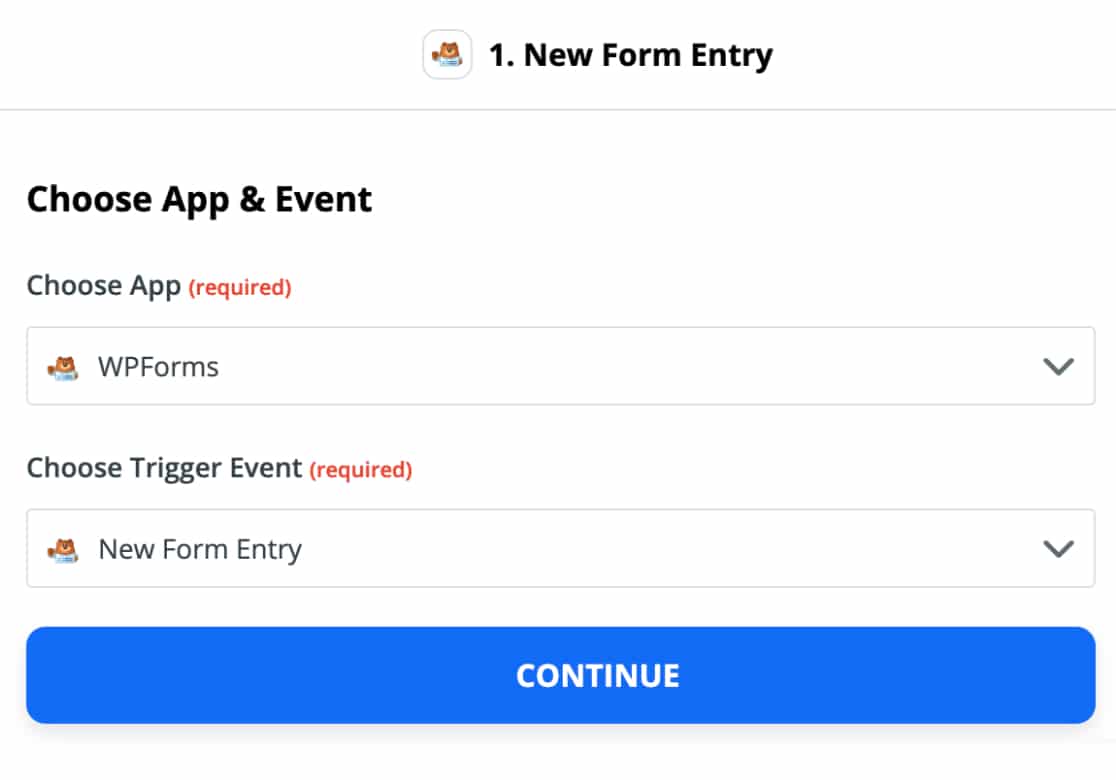
Now the next step is that you will need to setup Choose Trigger Event for WPForms. By default the option New Form Entry is displayed, you should select it and click on the continue button. Refer to the image below:
The next step is setting up a connection between WPForms and Zapier, to do that you will need to sign in to your WPForms account.
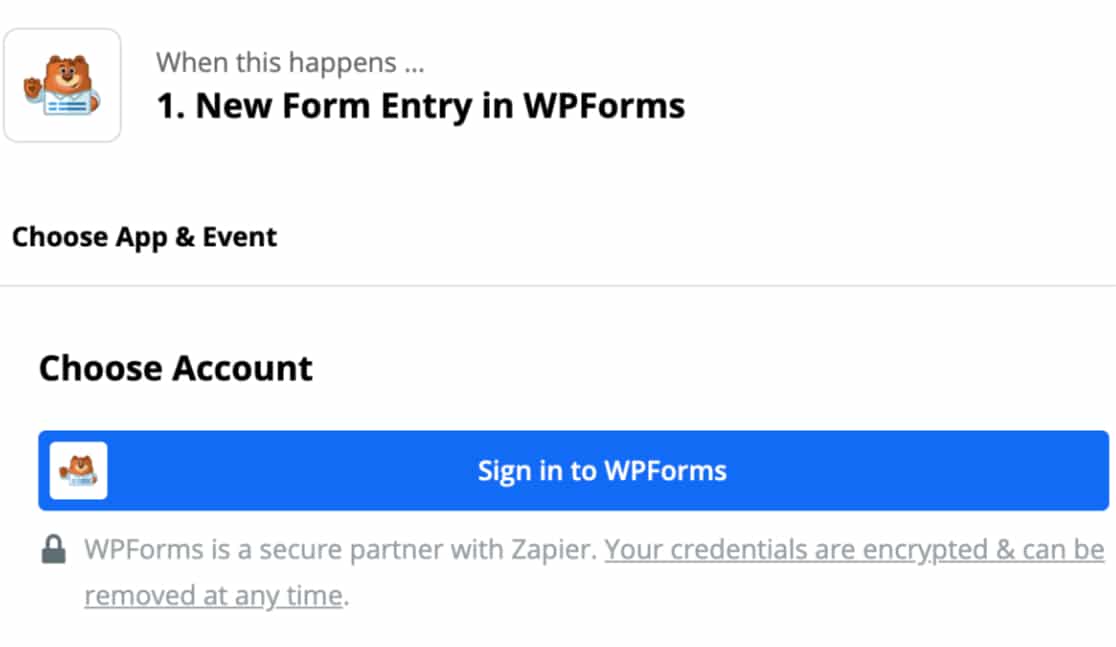
Once you click on the sign in button, you will be prompted to input the API credentials. You can find WPForms credentials within WPForms settings. You can copy those, come back and paste it into Zapier’s current window.
Once you do that, you will be prompted to enter the complete website URL including the forward slash. After you have filled your website details you should click on the continue button as shown in the image below:
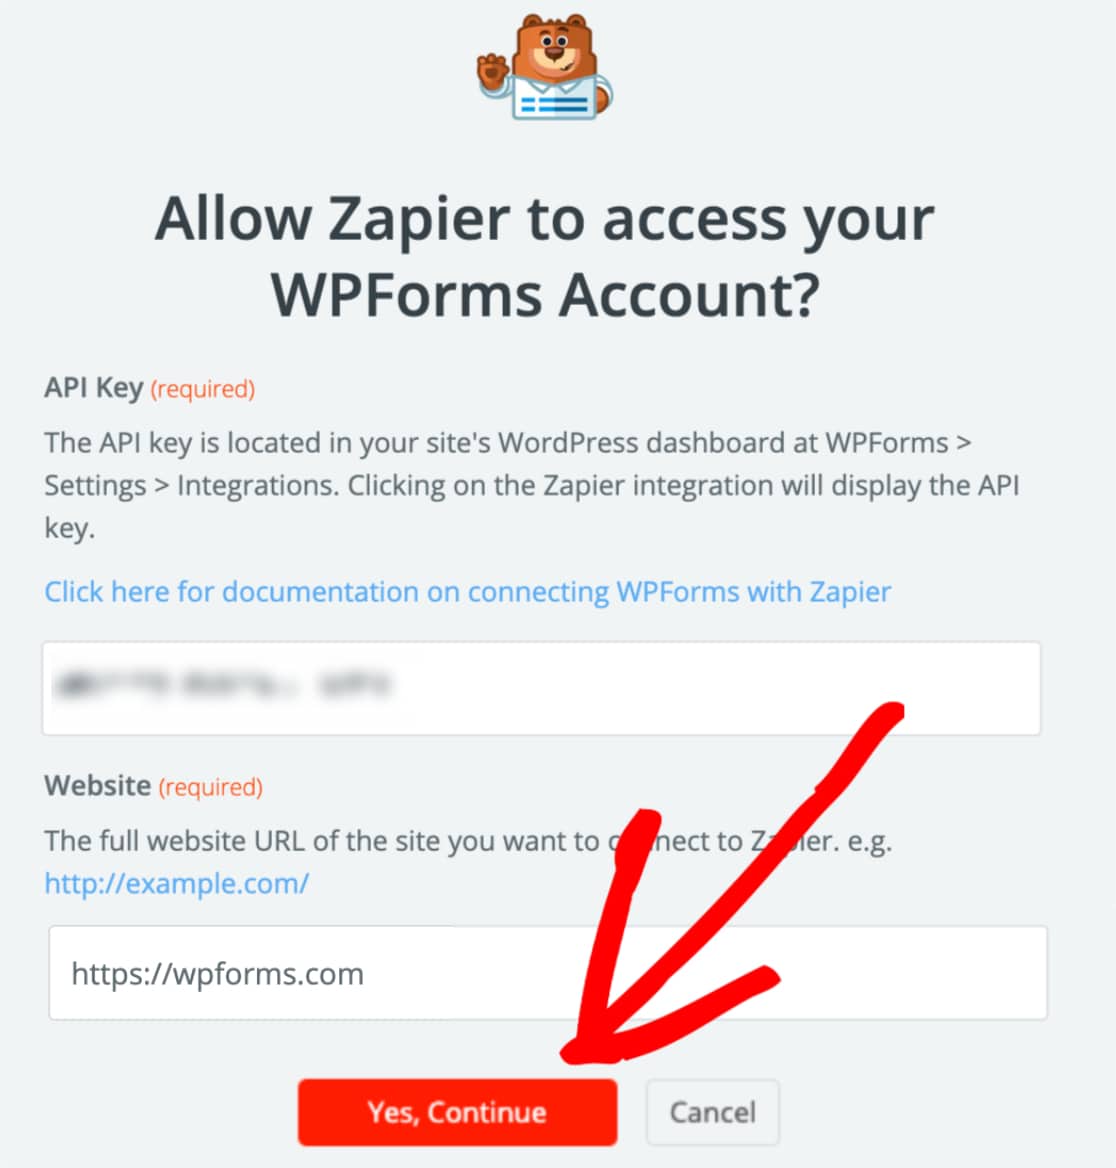
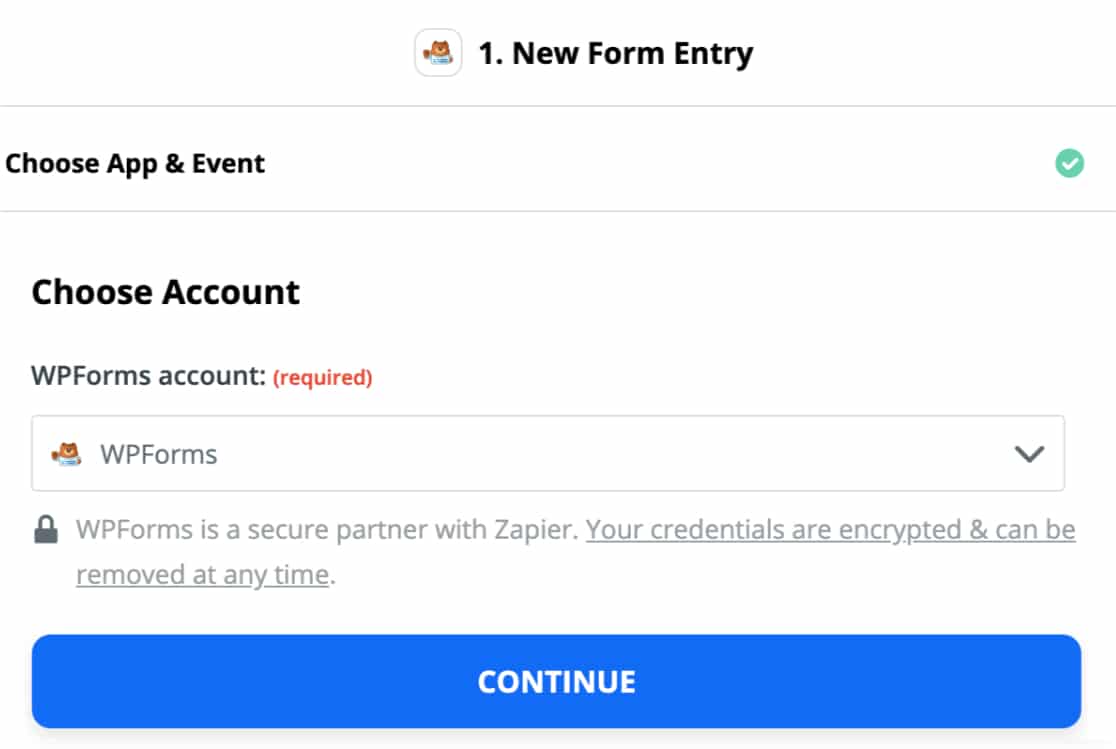
By now your website should be connected and ready to be used. The next step is that you will need to select an account for the purpose of creating a Zap. For this you can select your website’s name and then click on the continue button as indicated in the image below:
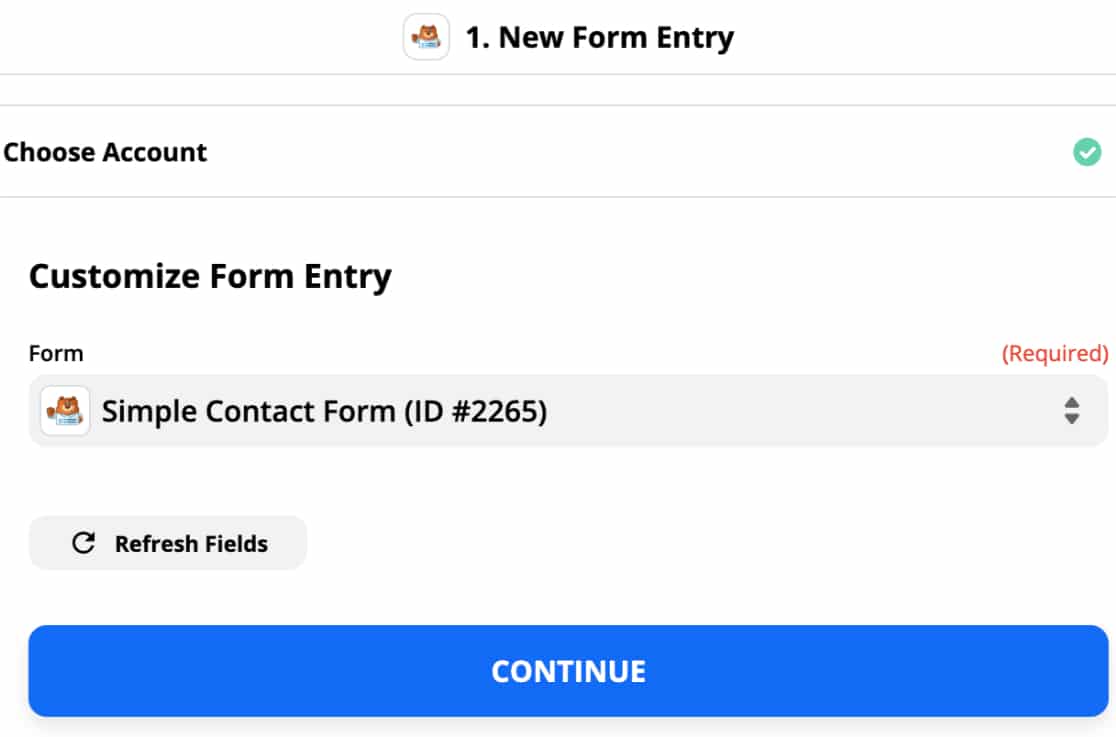
Now for the Customize Form Entry select the form that needs to be used and click on the continue button.
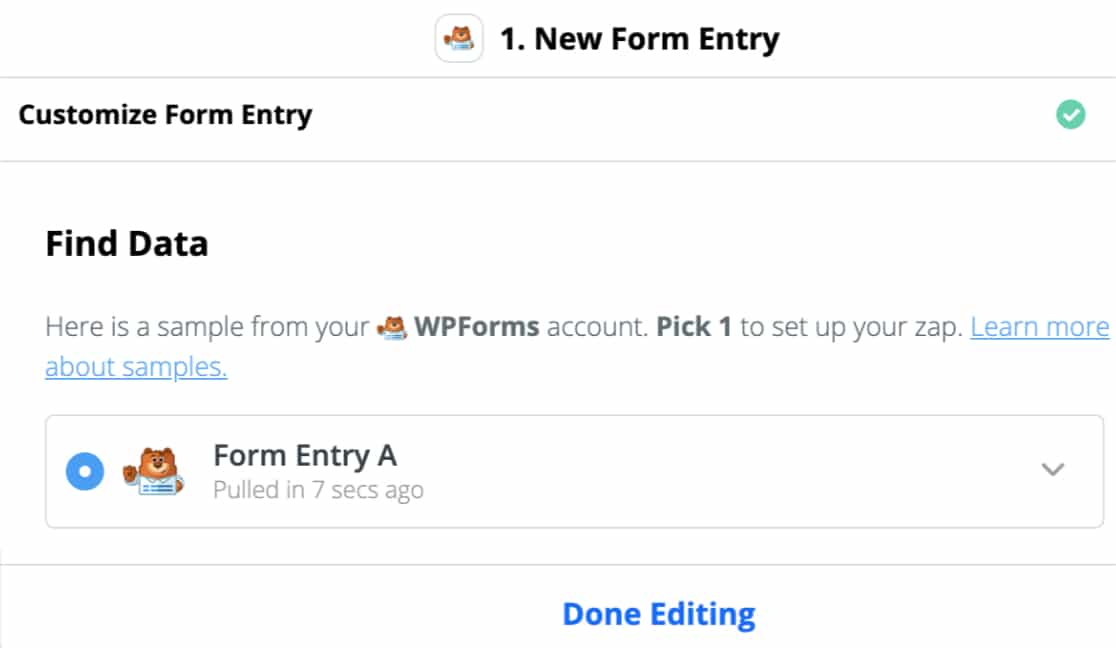
Now you should see Find Data dialog where you can test and check the connection. Now you may either choose to Test & Continue or Test & Review to check the connectivity. Please note that the form needs to have at-least one entry for successful testing.
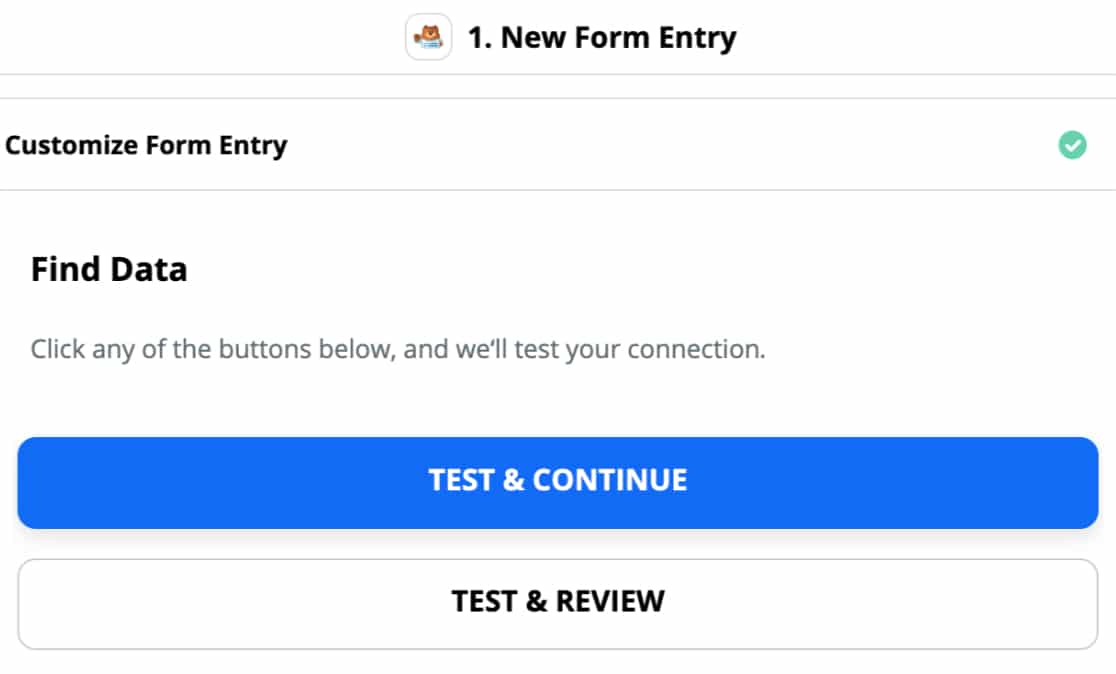
Clicking on Test & Review will indicate whether the data has been pulled appropriately or not. Once you get that confirmation you can click on the Done Editing button.
Clicking on the Test and Continue button will skip the above step and take you straight to the next step that is Choosing App & Event.

So far integration of WPForms and Zapier was successfully done, now you will need to choose an app or service in the above dialog box that you would like to integrate with WPForms. As already mentioned there are more than 2,000+ apps that you can integrate with WPForms withe the help of Zapier.
Now further the options and settings will vary depending on the app or service that you would select. Please refer to this integration guide for further assistance.
I hope that this article on How To Automate Your Work With Zapier And WPForms is helpful. Keep visiting my site for new stuff.
Similar Articles:
- Best WordPress SMTP plugin – How to send Email through SMTP in WordPress
- Best way to share WordPress analytics reports with Google Analytics
- Best conversational forms for WordPress sites
- Best Examples to Create Order Form in WordPress using WPForms Plugin
- MS Word Shortcut Keys PDF - October 13, 2024
- What is MS Word and its Features PDF - October 10, 2024
- 10 Free Word Templates for Every Need - October 10, 2024

