How to Create Online Donation Forms for Nonprofits
Asking for Donations? Do you have a WordPress website? Do you want to know How to Create Online Donation Forms for Nonprofits? This WordPress Plugin Can Help. If you are a Nonprofit organization or an individual who want to raise funds for charity purpose, you need to learn how to create online donation forms.
Online Donation Form is an easy and quickest way to collect funds online. In this tutorial you will learn the easiest method to create an online donation form and integrate with Paypal or Stripe.
Simple Donation Forms to Help You Jumpstart Fundraising
Most of the time just adding a Paypal donation button on your website doesn’t really work well. Instead creating a customized form with selective fields increases the chance of donation. Customizing the donation form has more other benefits such as you can insert or add a subscription button along with a donation form. It facilitates better user experience. Not only that it also gives the donation form a professional look.
There are plenty of WordPress donation form plugins available in the market. But my choice and recommendation is WPForms because its easy to use, robust, comes with a lot of addons and offers easy payment integration options. The peculiar thing about the payment integration that WPForms offers is that, your website visitor is not redirected to other paymant sites and they can make the donation from within the donation form while still staying on your website. Attractive deals and offers on WPForms, follow this link to grab the deals Now.
Here is a quick video tutorial that shows you how to create a simple donation form in WordPress using WPForms:
How to create and customize your donation form in WordPress using WPForms?
Prerequisites: You need to have a Pro license of WPForms so that you also get Paypal and Stripe Addons bundled with it. Attractive deals and offers on WPForms, follow this link to grab the deals Now.
1st Step: Installing and activating WPForms
Once after you have purchased WPForms, you can login your account, navigate to the downloads section and download WPForms builder plugin as shown in the image below.

Later you can upload and activate the plugin. After that you will also have to validate your license. You can watch the video below for step by step instructions. It explains you how to install a WordPress plugin and also how to upload and install a premium plugin.
2nd Step: Form Templates Pack Addon, PayPal Standard and Stripe Addons
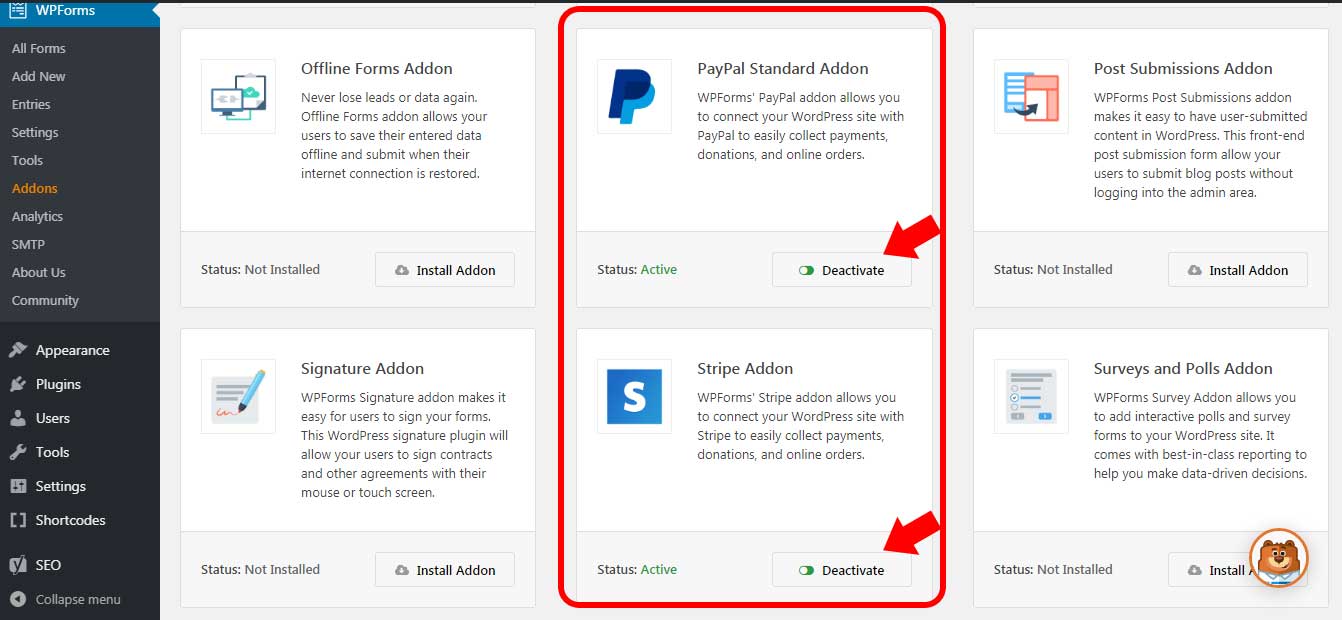
To install and activate the addons just follow these steps: From the dashboard go to WPForms ⇨ Click on addons ⇨ Then click on install addon ⇨ And then click on activate. (There are a number of addons that comes with WPForms. For this tutorial, installing and activating Templates Pack Addon, PayPal Addon and Stripe Addon are enough)
Refer the images below:
You may go though the video tutorial below for step by step instructions and a complete understanding.
3rd Step: How to Create Online Donation Forms for Nonprofits
From the WordPress dashboard go to ⇨ WPForms ⇨ then click on Add New as shown below ⇨ then type a name for you online donation form ⇨ then click on create a donation form. This creates a simple donation form.
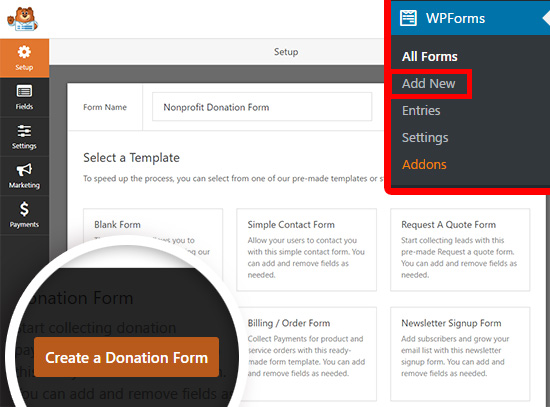
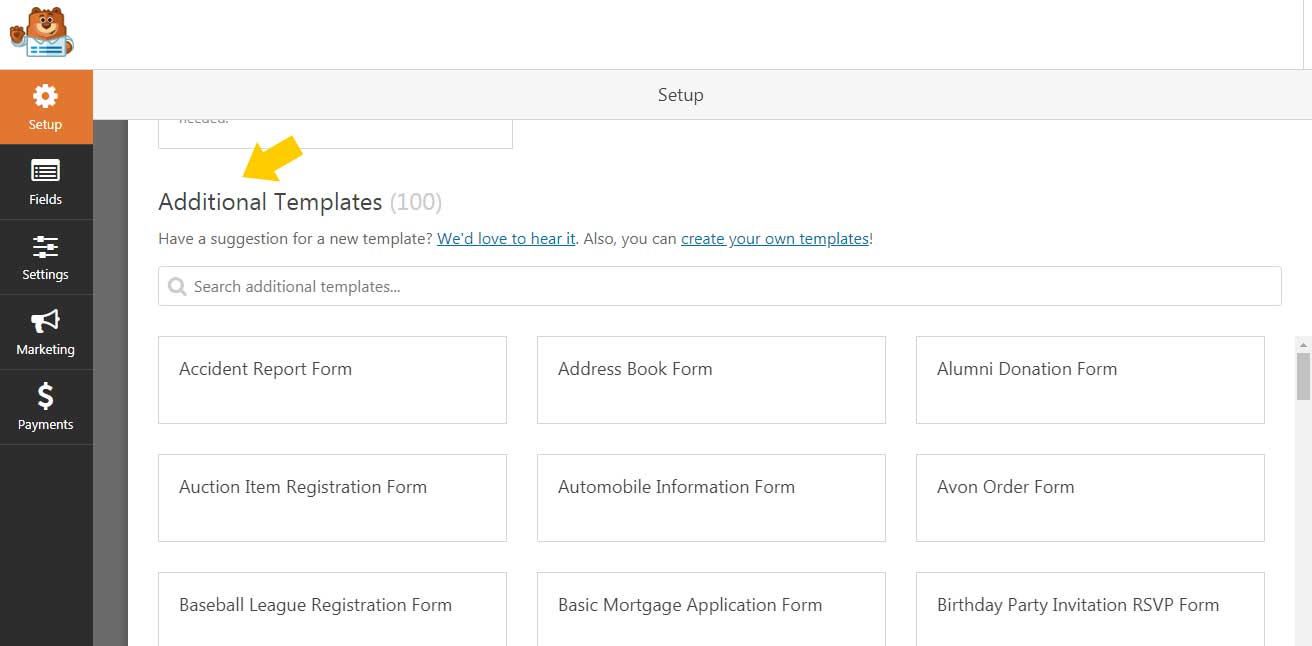
Installing and activating additional Form Templates Pack Addon will get you access to more other form templates as shown in the picture below:
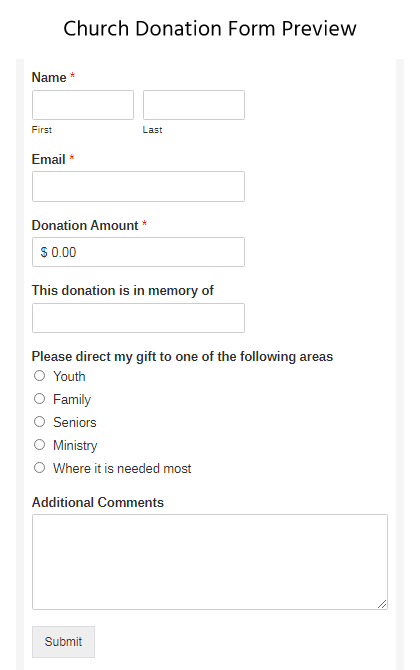
Here you can find a lot of pre-built forms dedicated for donations. You can preview some of the donation forms below:
You may be prompted to set your payment settings as shown below, you may skip this at this time and do it once after your form is designed completely.
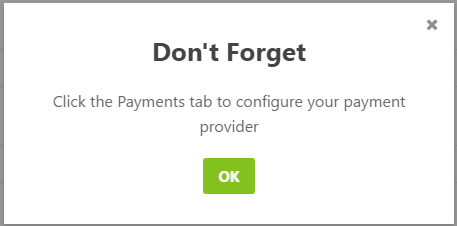
4th Step: Customizing your donation form by adding or altering the form fields
If you want to create a custom donation form you can select simple donation form or blank form template and then add fields as per your requirement. You can add additional fields to your donation form from the left panel to the right as shown below.
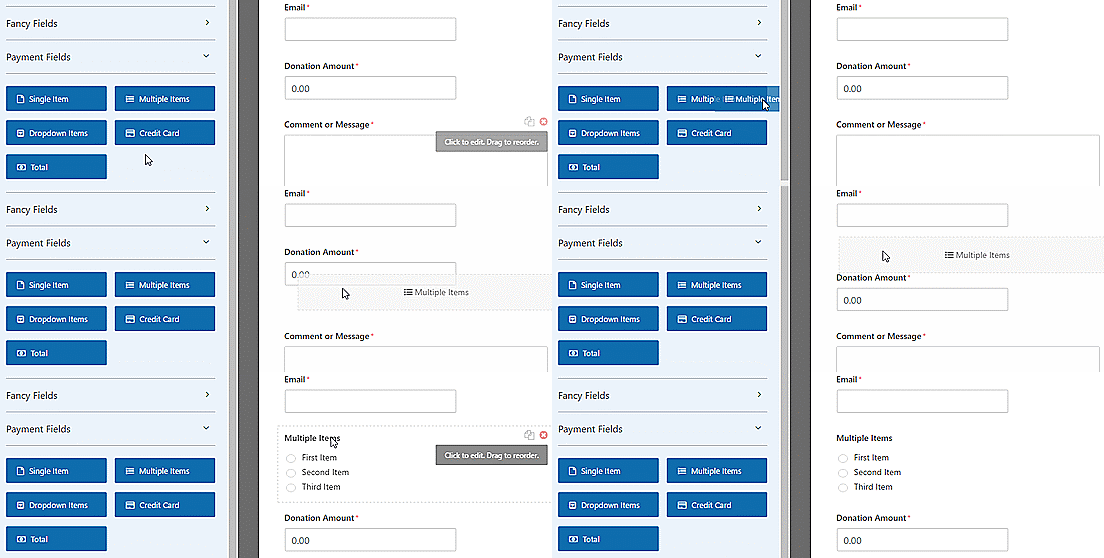
You can add payment fields such as Single Item and Multiple Items. Below is an example of Multiple Items payment field.
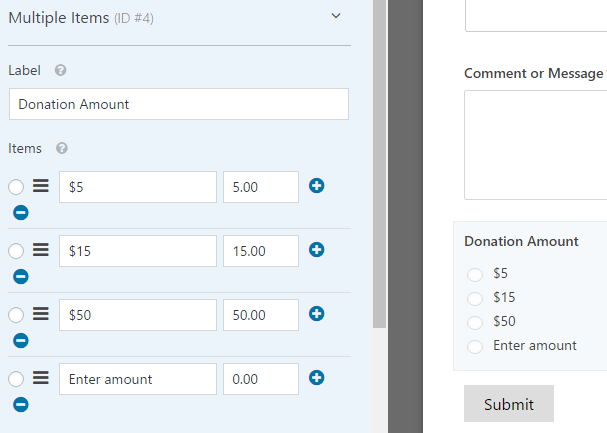
By clicking the fields on your right panel will display the settings pertaining to the selected field on the left panel where you can change its settings. For example you can customize the name and amount as required as shown below.

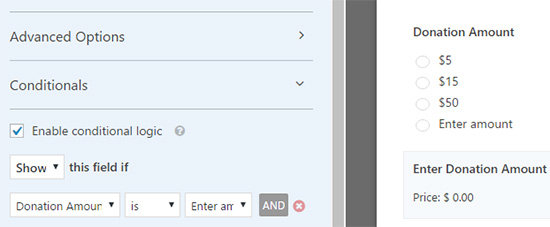
You can also apply conditional logic for a particular field as shown below:
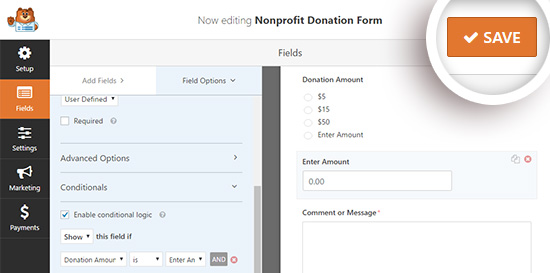
Once after you have done with all the settings click on the save button as shown below:
5th Step: Payment integration for Paypal or Stripe
To integrate with Paypal or Stripe, click on the payments tab, then click on the Paypal or Stripe.

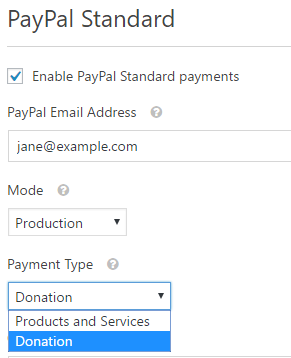
Click and check the option Enable Paypal Standard Payments, then enter your Email ID, select the mode as required and finally select the payment type as shown below.
Watch the video tutorial below to lean how to configure payment settings for Paypal. The steps are similar for Stripe as well.
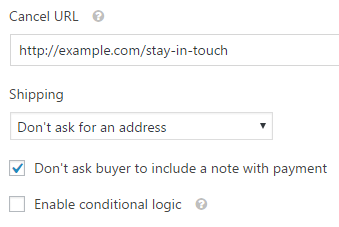
If the donation process is cancelled by the user at some point, he or she can be redirected to same or another page which could help reengage and convince the user to re-initiate the donation again. Also they can be requested to follow you through social media. To do that enter the URL in the Cancel URL box shown below.
Once you are done with all the settings click on the save button.
6th Step: Customization of the Notifications
To customize the email notifications, go to the settings and click on notifications as shown below:

You can create a dedicated notification for the donors by clicking on Add New Notification button as shown below:
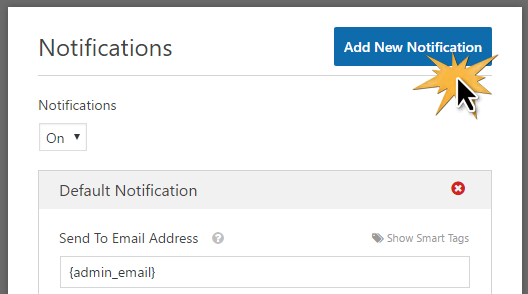
Now enter a name for the notification and click on the ok button as shown below:

To make sure that the email is sent to the donors you will need to follow these steps. First click on Show Smart Tags and then click on Email. This generates and adds the code that looks like this {field_id=”1″}. Refer the image below:
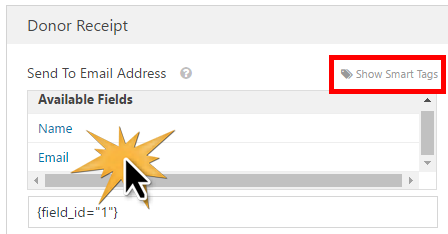
Next scroll a little down and enter a custom message for your donors. Also make sure to type this code {all_fields} at the end. And click on the save button to save the settings.

7th and Final Step: Placing the Donation Form on your website
It is advised to place the donation form at places where your website visitors or donors can quickly locate your donation form without much searches or lookup. If you want your online donation form to be visible all the time, then you can insert it on sidebars. You may also create dedicated pages or posts and add the donation form there. To add or insert a donation form on a page or post follow these steps:
When you are in page/post editing mode you can click on Add Form button, select the donation form and click on Add Form button as shown below:
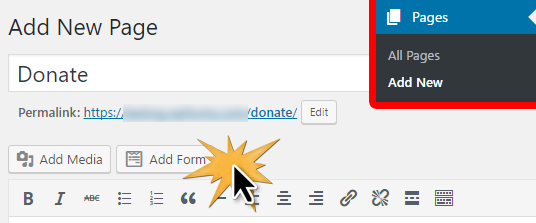
Alternatively you may also copy and paste the shortcode of a particular form as shown below:

Once done click on update button. If you are creating a new page then you will have to click on the publish button.
Hope this article on How to Create Online Donation Forms for Nonprofits? will help the Non Profits and individuals to do online fundraising with ease. Attractive deals and offers on WPForms, follow this link to grab the deals Now.
Similar Articles:
- Best WordPress SMTP plugin – How to send Email through SMTP in WordPress
- Best way to share WordPress analytics reports with Google Analytics
- Best conversational forms for WordPress sites
- Best Examples to Create Order Form in WordPress using WPForms Plugin
- MS Word Shortcut Keys PDF - October 13, 2024
- What is MS Word and its Features PDF - October 10, 2024
- 10 Free Word Templates for Every Need - October 10, 2024

