How to Make Sure Emails Don’t Go to Spam?
Are Your Emails Delivered but Not Received? Are you wondering How to Make Sure Emails Don’t Go to Spam? Then read this post till end. In this tutorial I’ll tell you how to setup SMTP (Simple Mail Transfer Protocol) using Amazon SES and WP Mail SMTP plugin to solve your email deliverability issues. Everybody wants to know this concept so should you.
Please note that this tutorial is meant for those whose websites are built using WordPress CMS and also for those who want to use Amazon SES with WP Mail SMTP plugin.
Click here to subscribe to WP Mail SMTP WordPress Plugin

First lets understand Why Are My Emails Not Being Delivered?
By default WordPress is made to use PHP mail function to send and receive Emails. Many a times your web hosting servers might not be properly configured to use PHP mail function. This causes authentication issues. As a result the mails, messages and autoresponders etc don’t work properly and possibly won’t reach your client’s inbox. The worst thing is that is may land in the spam folder.
So instead of using the PHP mail function the most recommended method is using SMTP Protocol. Since SMTP protocol is the standard protocol used by almost all popular Email clients such as Gmail, Yahoo Mail and Outlook Mail etc, there wouldn’t be any kind of authentication issues. Hence there wouldn’t be email deliverability issues as well. Continue reading to know How to Make Sure Emails Don’t Go to Spam?
Now Lets Understand What Is Amazon SES?
Amazon SES or Amazon Simple Email Service is a High-scale cloud email service offered by Amazon. This email service is highly scalable, flexible, and most importantly very cost-effective solution. Amazon SES is a boon to E-Commerce website owners and email marketers especially when they want to do mass promotion and send a lot of autoresponding email notifications without any email deliverability issues. It offers flexible IP deployment which ascertains email authentication, higher deliverability and credibility to the sender.

When do you need Amazon SES service?
This is an important question. You actually need this service when you want to do mass email promotions and also when there is need to send autoresponding emails through your website (this is prevalent with ECommerce stores).
For a small scale email promotion its absolutely ok to use the SMTP protocol of your web hosting provider. But when you start sending bulk emails within a short period of time, they might not be delivered as expected due to the limitations of your web hosting.
So at this point you should consider using Amazon SES service.
Since Amazon SES is highly scalable and reliable with the best infrastructure, its more consistent than your web hosts email service. One of the many benefits of this service is that you also get additional tools dedicated for email marketing activities.
Please note that your website should have an SSL certificate in order to use Amazon SES service. Also you need to have a business email id like example@yourdomain.com (this is required to setup WP Mail SMTP for your WordPress site).
Before I proceed let me tell you about the prerequisites:
You nee to have a subscription of the following:
- WP Mail SMTP Pro (this is mandatory to integrate Amazon SES with WP Mail SMTP)
- Amazon AWS (Free subscription is sufficient initially, later it could be upgraded according to your requirements)
Setting Up WP Mail SMTP and Amazon SES
First I will show you how to setup Amazon AWS 12 months free subscription. Then late I’ll show you how to setup WP Mail SMTP. Follow the step by step instructions below:
1st Step: Creating Amazon AWS (free account)
You may skip this step if you have already singed up for Amazon AWS.
If you don’t have no worries, just click here to create a free Amazon AWS account.

Please note: Even though you are creating a free Amazon AWS account, it is mandatory to provide your credit card details.
2nd Step: Region Selection
After you have signed up successfully, the next step is to select the exact or closest region based on your address. If you can’t find the exact one you may go ahead and select the nearest one.

3rd Step: IAM User creation
Once you are done with the second step, you should create an IAM User in order to get the access keys that is required in the later steps.
This link takes you to the IAM User registration page
After you are signed in click on Add user button. Then type a user name similar to yourdomain_wpmailsmtp. Creating users helps you track additional users activities.
Next check the option Programmatic access as shown in the image below:

Then click on Next: Permissions button
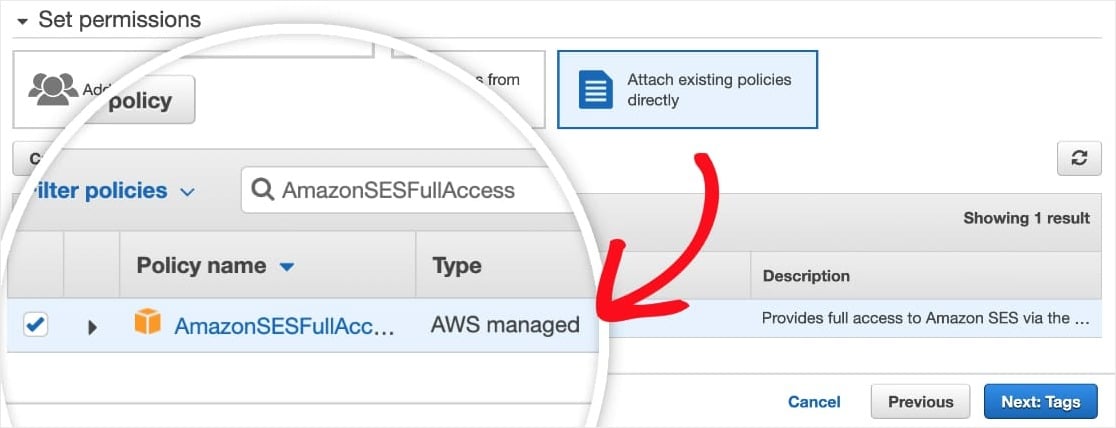
4th Step: Setting Permissions for IAM User
Click on Attach existing policies directly, then in the search box type “AmazonSESFullAccess” (make sure that you don’t type the quotation marks). Also you should select the check box located before the Policy name as shown:
Then click on Next: tags button and then click on the Next: Review button.
5th Step: Reviewing the User Details
In this step ensure whether all the information is correct, if not make the necessary changes and click on the Create user button as shown:

As just as you click the Create user button you should get a success message. You should also be able to see Access Key ID and Secret Access Key credentials of your user.
Please note that you should download the CSV file before closing this dialog box because you will not get these details again.
For now don’t close this window as you will be needing these credentials for the later steps.
6th Step: Switching to AWS Production Mode
By default Amazon SES starts in Sandbox Mode that limits sending emails to just the email ids that is verified. So in order to send emails to everyone else you want, you need to switch to AWS Production Mode.
Next you will need to create a Request with Amazon Web Services. So to do that click this link: https://aws.amazon.com/ses/extendedaccessrequest/
Now click and select Service limit increase box as shown in the image below:

Now fill in the Case Classification form. This option helps check spammers. This form also ensures that you will use Amazon SES services for legitimate purposes only.
At this point you will have shared all the details as shown in the image below:

Now you should enter Use Case Description. Here is where you should write something about your website and also you need to tell why you need to send emails. You should enter the exact purpose else there may be a chance of rejection of your application.

After that click on the Submit button. Later within a day or so you should receive 2 confirmation emails from Amazon Web Services after the review.
6th Step: Install and activate WP Mail SMTP WordPress plugin
Refer this article to learn about WP Mail SMTP WordPress plugin:
Best WordPress SMTP plugin – How to send email through SMTP in WordPress
7th Step: Integrate WP Mail SMTP and Amazon SES services
After activation Go to WP Mail SMTP Settings. For the From Email type your business email address. Then check Force From Email (the email address which emails are sent from). Continue reading to know How to Make Sure Emails Don’t Go to Spam?

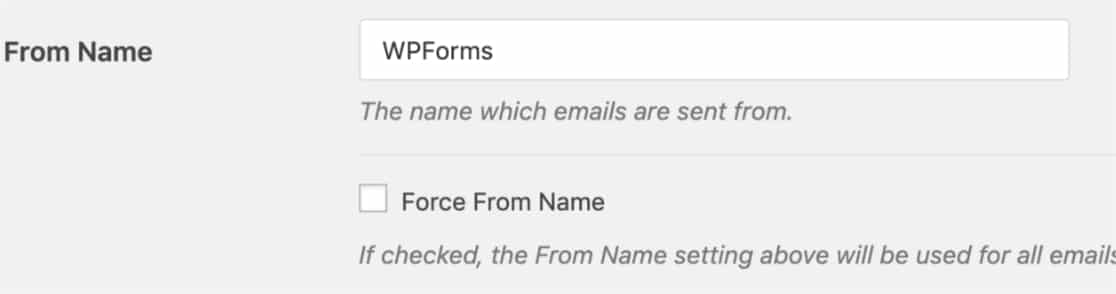
Now enter a name for the From Name (this can be your company or brands name) and also check the Force From Name if you want to force all emails use this name by default.
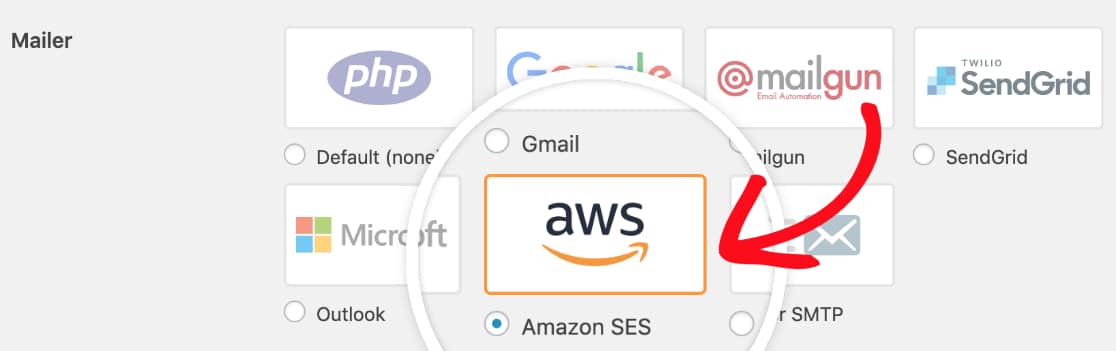
Then select Amazon SES option as shown in the image below:
Its recommended to check Set the return-path to match the From Email. This will help notify you of any bounced messages.

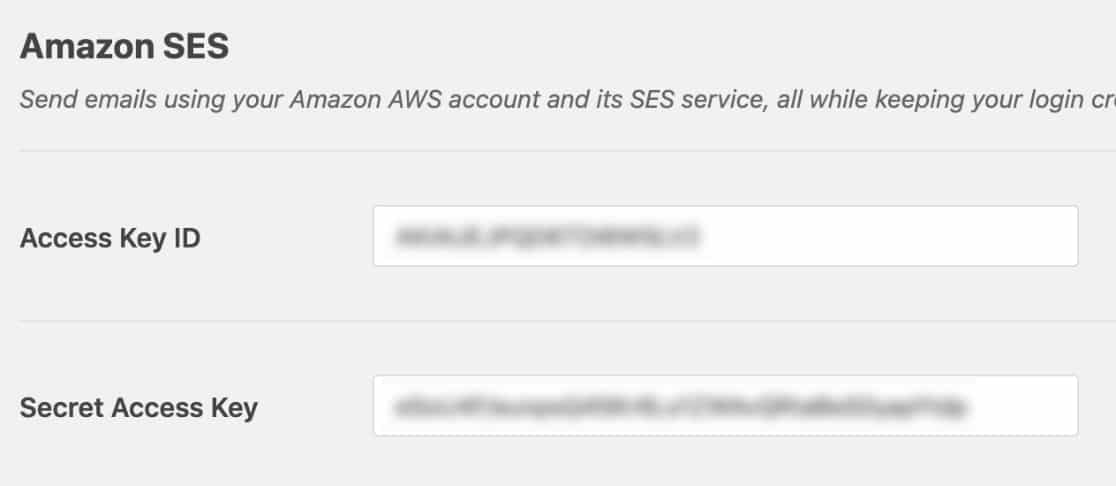
Next enter the Access Key ID and Secret Access Key.
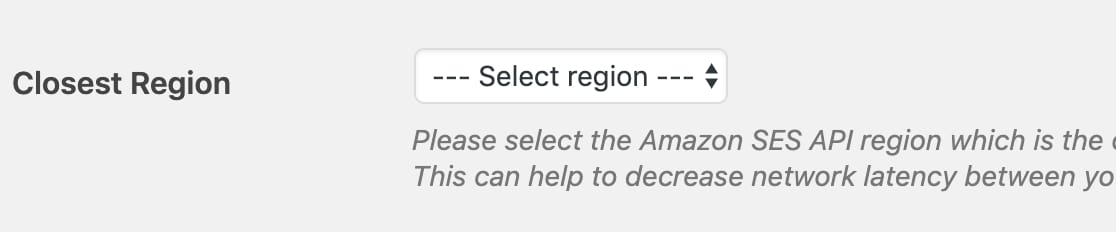
Now select the region that closely matches your web hosts server location.
Next click on click Save Settings button.
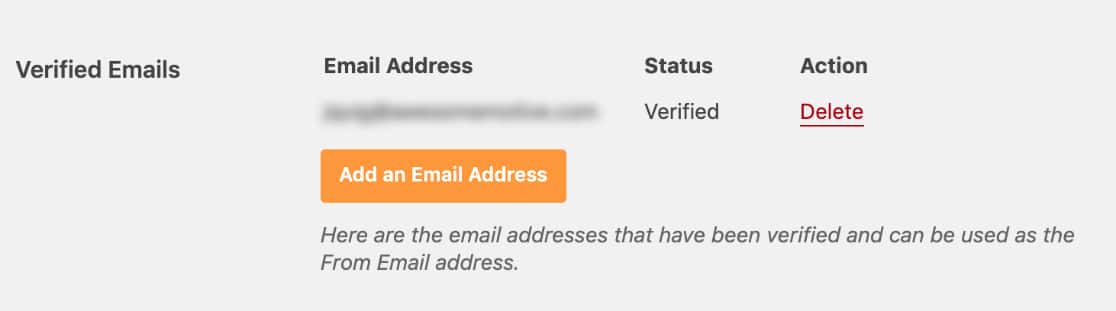
At this point you will be asked for Verified Emails (this email will be used as the From Email for your site). So go ahead an click on Add an Email Address.

You can add one or more email addresses at this stage. Then click on send verification button.
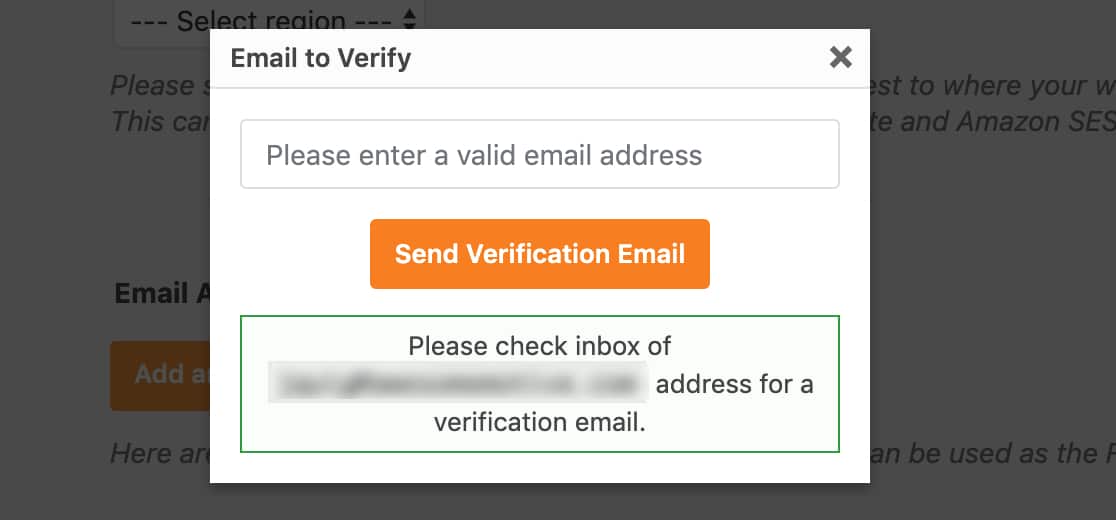
Check your inbox, click and verify the email sent by Amazon within 24 hours.

Once your email addresses are successfully verified, come back and refresh the WP Mail SMTP settings page. Now you should see the emails that are verified.
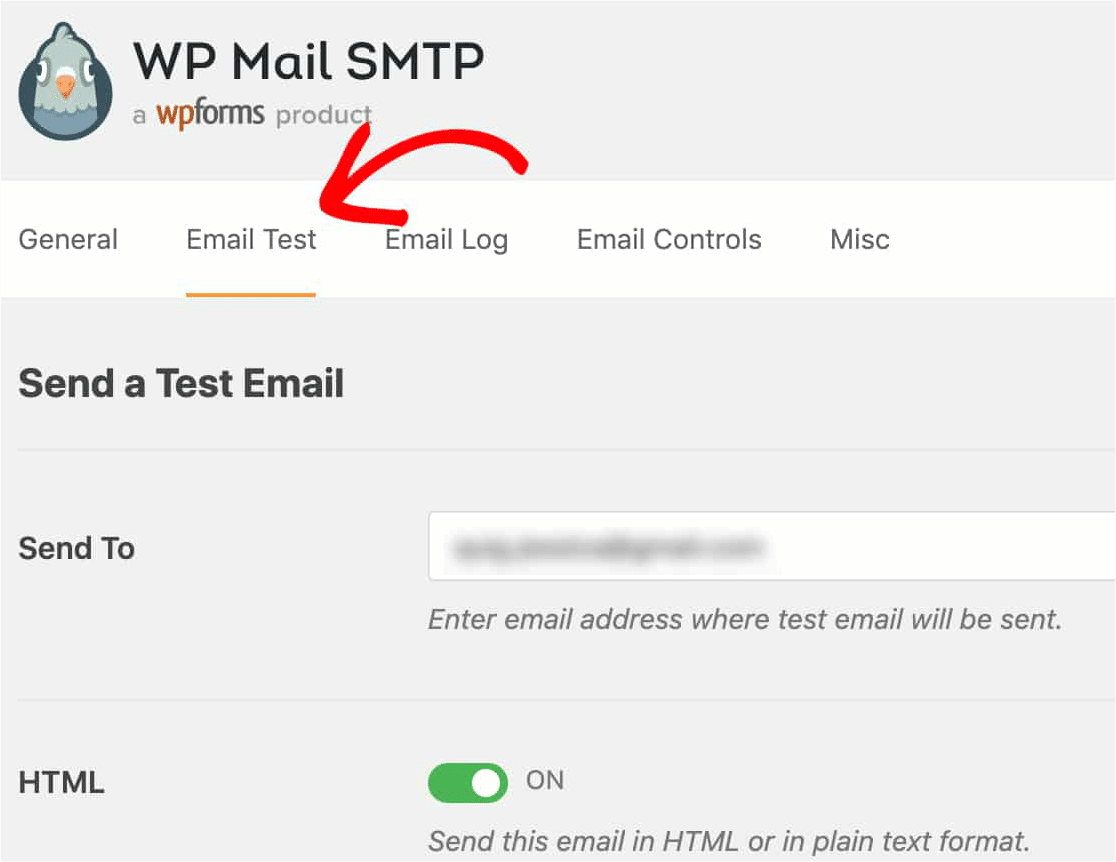
8th Step: Email Testing
Perform an email test by going to the Email Test tab and click on Send Email button. Note: Make sure that Send To field is set to your admin email and also make sure that HTML option is turned on before you click on Send Email button. Continue reading to know How to Make Sure Emails Don’t Go to Spam?
If everything is perfectly done you should see a success message as shown in the image below:
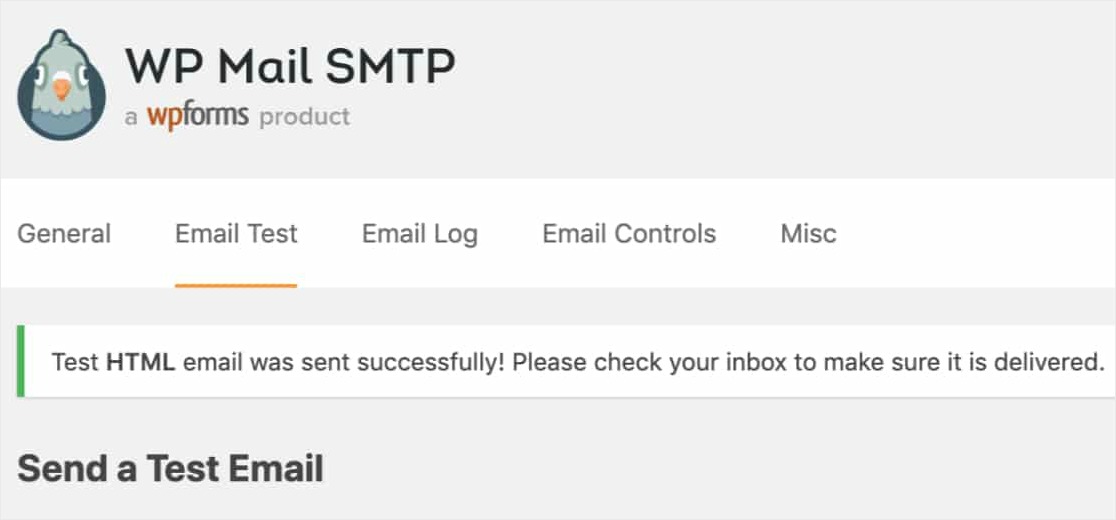
And also you should receive the test email to your inbox as shown:

So its all done now! Cheers!
I hope that this article on How to Make Sure Emails Don’t Go to Spam? is helpful and also I hope that you got a glimpse on Amazon SES and WP Mail SMTP integration.
Click here to subscribe to WP Mail SMTP WordPress Plugin
Similar Articles:
Best WordPress SMTP plugin – How to send email through SMTP in WordPress
Best way to share WordPress analytics reports with Google Analytics
Best way to make your google analytics comply with CCPA
Best way to share WordPress analytics reports with Google Analytics
How to Use Email Marketing to Skyrocket Your Sales
How to Connect WordPress Website Leads And Salesforce CRM
- MS Word Shortcut Keys PDF - October 13, 2024
- What is MS Word and its Features PDF - October 10, 2024
- 10 Free Word Templates for Every Need - October 10, 2024