Simple Email Marketing using Mailchimp and WPForms
In this article you learn about Simple Email Marketing using Mailchimp and WPForms. When we talk about Email Marketing, the first thing comes to the mind is the Email list. Without this Email Marketing isn’t possible. So the first thing one should do is to collect the Email Ids. One of the prime ways to collect Emails are Subscription forms. This the simplest form of marketing strategies. If you WordPress site and are using Mailchimp for Email campaigns then this tutorial is just for you.
In this tutorial I’ll show you how to create a subscription form and integrate Mailchimp with WPForms to grow your Email list.
Prerequisites: You will need to have WPForms WordPress pugin to be installed and activated. Also you need to have a subscription of WPForms Pro or higher version for this option to work.

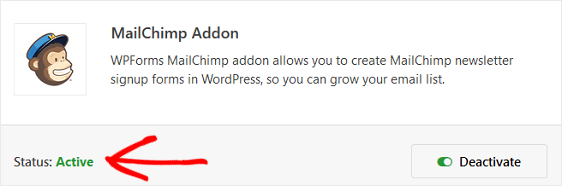
1st Step: Activating Mailchimp Addon for WPForms
Login to your WordPress → form the dashboard go to WPForms → then click on Addons → then locate Mailchimp Addon → then click on the install button → once installed click on the Activate button. Refer to the image below:
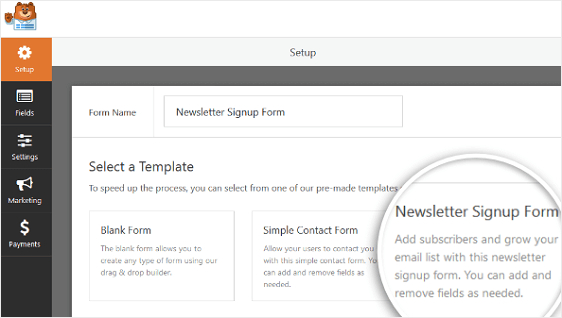
2nd Step: Creating a subscription form for Mailchimp
After activating Mailchimp Addon → head over to WPForms → and click on the Add New button. This action will bring the form creation screen. Here you will be required to enter a name for the form and select a form template. For this tutorial we are going to use the pre-made template dedicated for Newsletter signups. So just click on that as shown in the image below:
The template looks simple as shown in the image below. You could change the look and feel and add necessary fields as per your requirements.
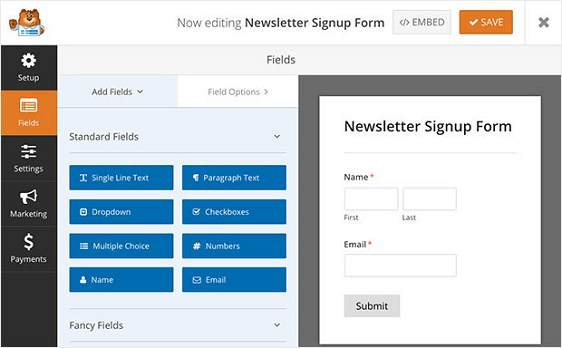
The form builder is split in two sections. On your left hand side you could find fields, settings, marketing and payments options. And on the right side is where you could build your form. You can drag the fields from the left and arrange it as required. Further you can click and select each field and change its settings.
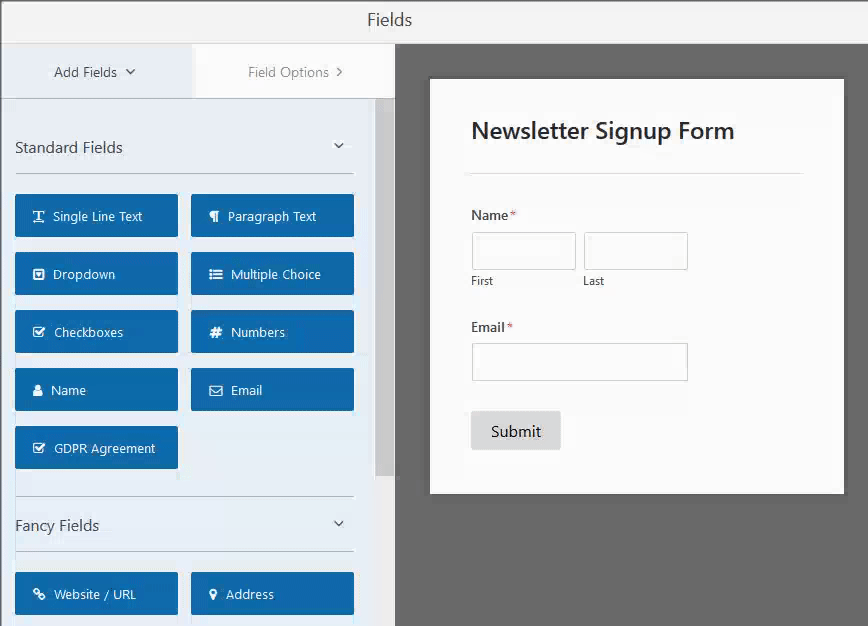
Now coming to Mailchimp form, you will have to add GDPR Agreement field in order to create a GDPR complaint form. Since you are collecting the personal details of your website visitors this step is mandatory. The graphic image below give you a glimpse of GDPR field.
You may change the default language for the GDPR field. Further you can go to GDPR Enhancements settings for more options and settings.
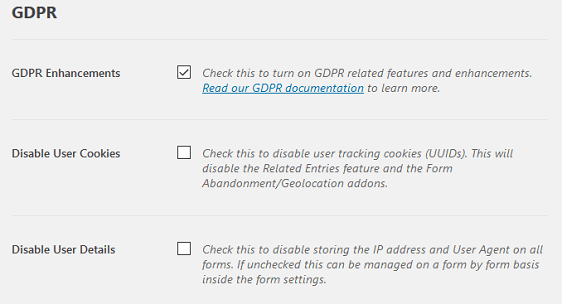
Here you can enable or disable user cookies and details. You may disable user details if you don’t want to store the user data such as the IP address.
Once after configuring click on save settings button.
Now the let us move to the next step and see how to connect Mailchimp and WPForms.
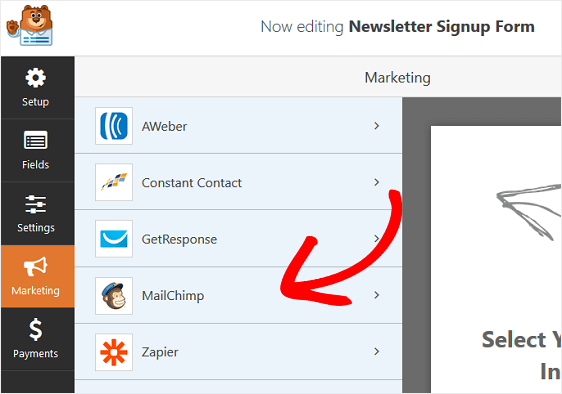
3rd Step: Linking Mailchimp and WPForms
To link Mailchimp and WPForms click on marketing tab and then click on Mailchimp as indicated in the image below:
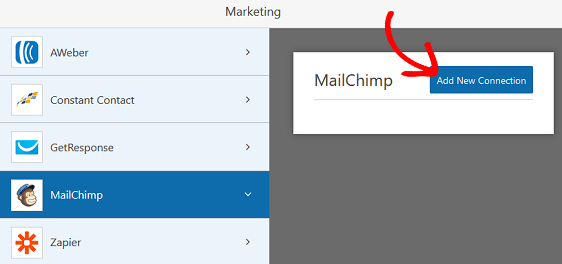
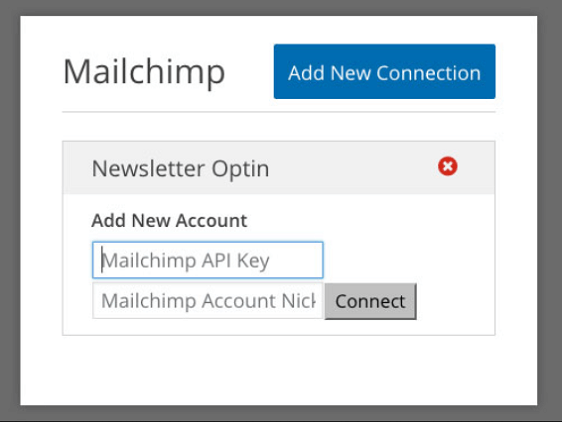
Then click on Add New Connection
You should see a popup like the below where you should enter a nickname for this connection. Please note that this is just for reference purposes only.
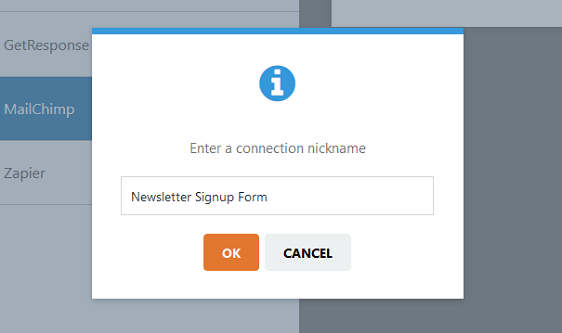
Once after enter a name click on the OK button. Next you will need to the Mailchimp credentials such as the API Key. You can find these details in your Mailchimp profile section. There you can go to the extras tab and find your API Key details.
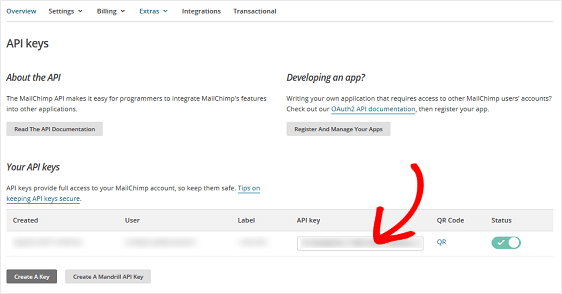
Copy these information, come back to WPForms settings and paste them. And then click on the Add New Connection button.
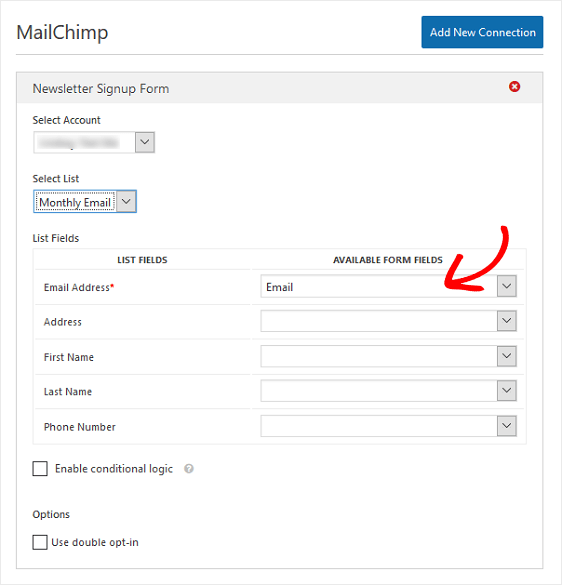
Once after you have entered the API key, select your Mailchimp account and click on the connect button. After that you will need to select the Email List. Then choose Email from the drop down as shown below. You may select the other fields too. These information will be added to your account when somebody subscribes you. Next thing is that you will need to check and select double optin to enable it.
Once everything is done click on the Save button.
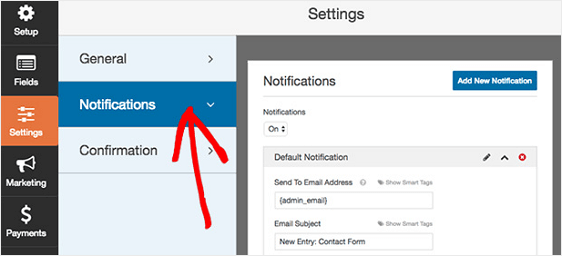
4th Step: Subscribe Form Notification Configuration
If you want to notify yourself and the subscriber, you will need to keep this option enabled. By default this option remains checked.
You can also make use of Smart Tags to notify the subscribers that their form was successfully submitted.
5th Step: Form Confirmation Configuration
In this step you can setup and configure a predefined Email message that will be sent to your subscriber immediately after the form submission.
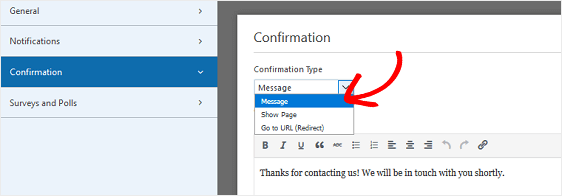
Here you can select the confirmation type whether to be a Message or a Show Page or a Go to URL.
If you select Message, the subscriber will be sent a Email confirmation message. If you select Show Page, the subscribers could be taken to a specific web page on your site. If you select Go to URL then you could redirect yur subscribers to an entirely different website.
6th and the last Step: Adding Mailchimp subscription form to a page or post on your website
There are many ways to add this subscription for on your website at various locations. The procedure varies depending on where you would like to add the form.
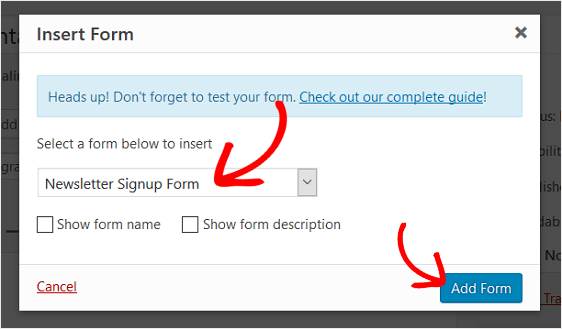
If you want to add Mailchimp subscription form to a page or post, then you could do one of the two things: Either you could copy and paste the Shortcode where you need the form to be inserted or you could click on the Add Form button and select this particular form and click on the insert button.
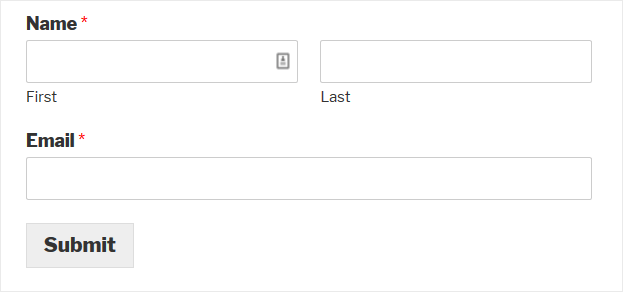
Later you may update the page or post. If you are creating a new page or post then you will need to click on the publish button. The Mailchimp subscription form should look similar to the one as shown in the image below:
My Thoughts & Conclusions
I hope that by now you will have learnt how to integrate Mailchimp and WPForms. WPForms is the #1 WordPress Form Builder plugin and Mailchimp is #1 Email Campaign tool. With the integration of these two super tools together you can perform your Email Campaigns more effectively.
Collecting the Email list through the subscription for alone does not complete the task of Email Marketing. Once after collecting the data you will need to export them of an Email Campaign tool like Mailchimp. Many of you might be doing this manually and this is not just time consuming but also sometimes lagging of your efforts. So the better way is to integrate your online subscription form directly with Mailchimp. This saves you a lot of your precious time and efforts.
Click here to know more about all the features of WPForms…!
I hope that this article on Simple Email Marketing using Mailchimp and WPForms is helpful. Keep visiting my website for more…
Similar Articles:
- How To Automate Your Work With Zapier And WPForms
- Embed Calculator on Website and Increase Website Traffic Fast
- How to Quickly Install Google Analytics Global Site Tag in WordPress (gtag.js)
- Best WordPress SMTP plugin – How to send Email through SMTP in WordPress
- Best way to share WordPress analytics reports with Google Analytics
- Best conversational forms for WordPress sites
- Best Examples to Create Order Form in WordPress using WPForms Plugin
- MS Word Shortcut Keys PDF - October 13, 2024
- What is MS Word and its Features PDF - October 10, 2024
- 10 Free Word Templates for Every Need - October 10, 2024